


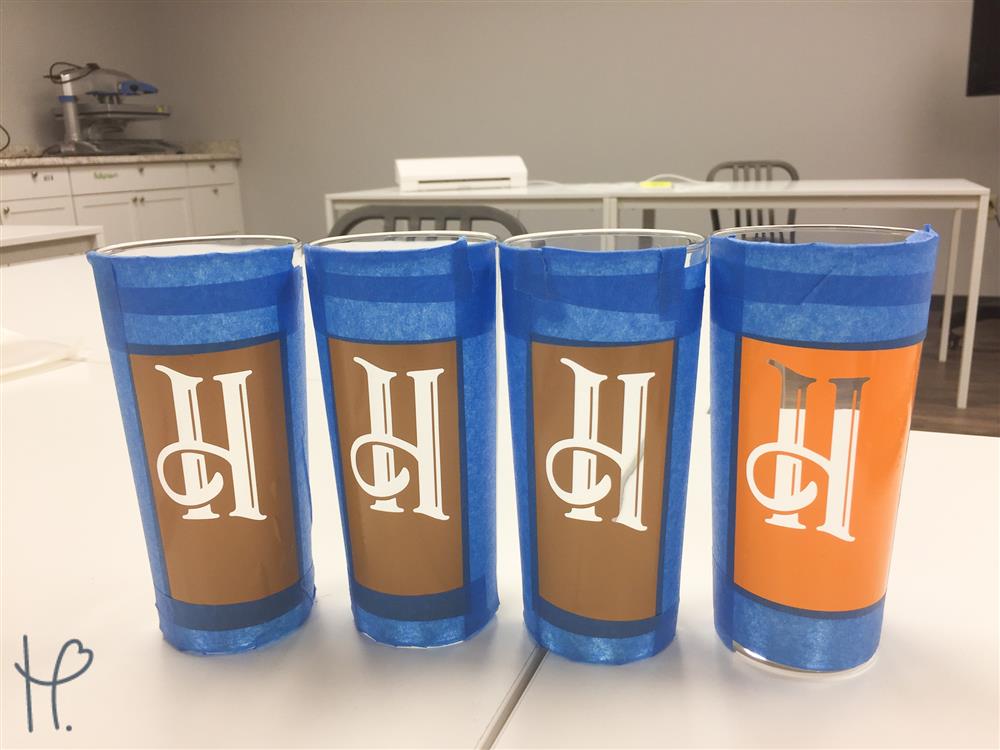
When we started working on the tablescape project, we knew we had to try our hand at glass etching. The nice thing about having a Silhouette Cameo is that the projects you can create are endless. Did you know that you can actually use adhesive vinyl to create a stencil for use with glass etching? That’s right, with just your Silhouette, etching cream, and OraCal 651, you can create a gorgeous etched design, that’s permanent and dishwasher safe.

What I Used:
- Silhouette Cameo 3
- Silhouette Studio
- Sarcastic Font
- Silhouette Glass Etching Cream
- OraCal 651
- Weeder Tool
- Clear Application Tape
- Lil’ Chizler Squeegee Tool
- Ikea Godis Glasses
- Painters Tape
When I was getting started, I had a font type in mind. Luckily, I had snagged this gorgeous Sarcastic font from the Hungry JPEG as a freebie. Every week, they list one of their fonts for free with commercial rights. I download each and every one because you never know, right?! The best part about this font is that it has so many alternative versions, unfortunately, it’s not always easy to find those in Silhouette Studio.
You can easily get around that though. If you’re using a Mac, you’ll open Font Book, find the font, and then the actual version of the letter you want to use. Then you’ll click on it to highlight it, press CMD + C to copy. Once you’ve copied your selection, you’ll open Silhouette Studio, create a text, and paste it in. It's probably not going to look correct, but now all you have to do is highlight your letter, and choose the same font that you copied from your Font Book.
If you’re using a PC, you’ll want to open your character map. You can search for this if you’re not familiar with it. You’ll then change your character set to Unicode and change the group by to Unicode subrange. Then in the selection box, you’ll select private characters. From here you’ll be able to find your font, in this case Sarcastic. Again, you’ll find the version of the letter or the glyph you want, copy it by using CNTRL + C, then paste it into Silhouette Studio and make sure you have the same font selected.
Once I had my character in Silhouette Studio, I did edit it a bit. I don’t usually like to contort my font, but since these glasses were so skinny, I really wanted this letter H to be a bit thinner. After I was satisfied with the size, I duplicated the H so that I had enough for a full set. Now, I was ready to cut! Since I was using OraCal 651 for this glass etching project, I cut my designs at blade 1, speed 8, and thickness 9.
After cutting my designs, I weeded all the letters out. Since I was going to be creating a stencil, I had to weed out the areas I wanted to be etched. This meant I needed to remove the H and keep the border. Then, I applied my clear application tape by squeegeeing the tape with my Lil’ Chizler. Then, I lined my H up on my glass and repeated this step for the entire set. Since I was using etching cream, I really focused on making sure these designs were applied to glasses. After using the Lil’ Chizler and peeling the tape off, I went over the entire vinyl design with my hand to push the OraCal to the glass as much as possible. I focused on the edges. I also used painters tape to cover the edes of my design to give me some more wiggle room with the etching cream.
Now comes what some people may consider the scary part! Applying the etching cream! Believe it or not, you do not need much at all. I applied the etching cream to my glass with a popsicle stick. You can use a paintbrush, your Lil’ Chizler, anything you’d like, but I had more success with a hard object. Once I fully covered my design, I moved the etching cream around a bit to get out any air bubbles in the cream. If you don’t do this, you may see uneven areas in the etch. Then, I let it sit for 2 minutes.
At the 2-minute mark, I took the popsicle stick and very carefully wiped the extra etching cream off the glass and put it back in the jar. That’s right, it can be reused so save as much of it as possible! Then, I rinsed the glass off before removing the vinyl. This helped to get any extra cream off to make sure it didn’t get on areas I didn’t want. It will be hard to see your design while the glass is wet. Make sure to dry it off to see the full etch.
I was able to cover all the designs at once instead of one glass at a time. That part is up to you. If you don’t feel comfortable doing them all at once, one at a time is fine as well.
Tips:
- Wear gloves! This stuff is potent. You don’t want to get this on your hands.
- Run extra water down your sink after rinsing your glasses to make sure you get it all out of the sink.
- If you’re worried about your design sticking to the glass surface, heat it up a bit with a hairdryer.
- Do some test runs of your design on a glass that isn’t for a customer or important. I tested this design 2-3 times on a scrap bottle to make sure I understood the process before wasting my glasses.
- Use scraps of colors of vinyl that you don't use often. This is a perfect time to use any colors you think are ugly or you picked up on sale!