


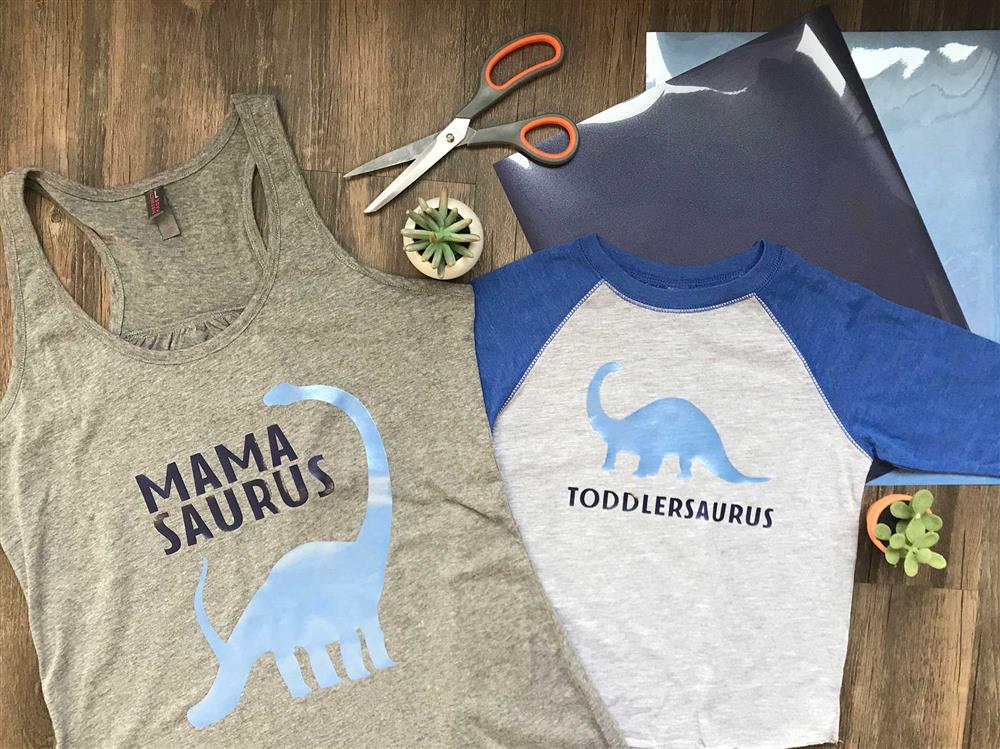
One of the best things about working with HTV is the ability to make custom shirts for your whole family at a pretty low cost. Everything from vacations, birth announcements, or family reunions are great reasons to make something for the entire family to remember. For this project I’ve created a “Mommy & Me” design, because what’s cuter than having a matching shirt with your little?
MATERIALS USED
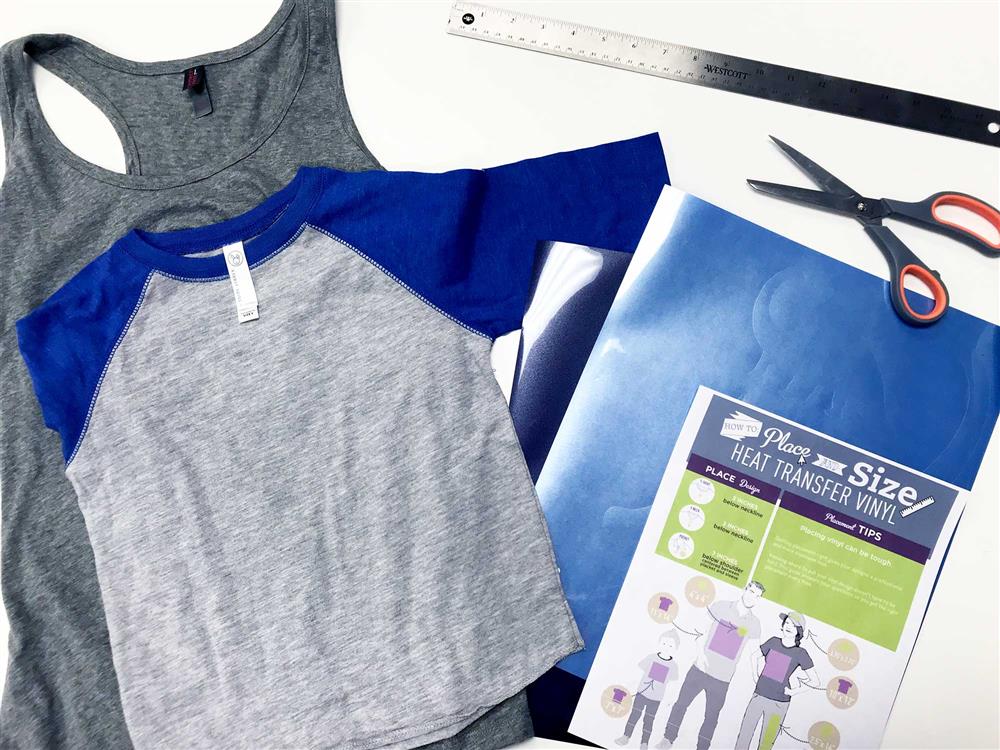
- Siser® Easyweed® Electric – Frosted Blueberry, Columbia Blue
- Cricut Explore Air 2
- Cricut EasyPress
- Reusable Cover Sheet
- Weeder Tool
- District Made Tank Top
- Rabbit Skins Toddler Baseball Jersey
STEP 1: DESIGN
There are so many cute ways to design any variety of matching family shirts. I’ve seen tons of witty designs made out of song lyrics, movie quotes, or any theme you can imagine. I chose to work with a super cute dinosaur theme for this mom & toddler combo using these wonderful dino SVG files from Red Earth and Gumtrees.
Once imported into Cricut Design Space I added in the lettering (done here in The Artsit – Sans font). When satisfied with both designs it was time to size them appropriately (using our handy sizing chart).
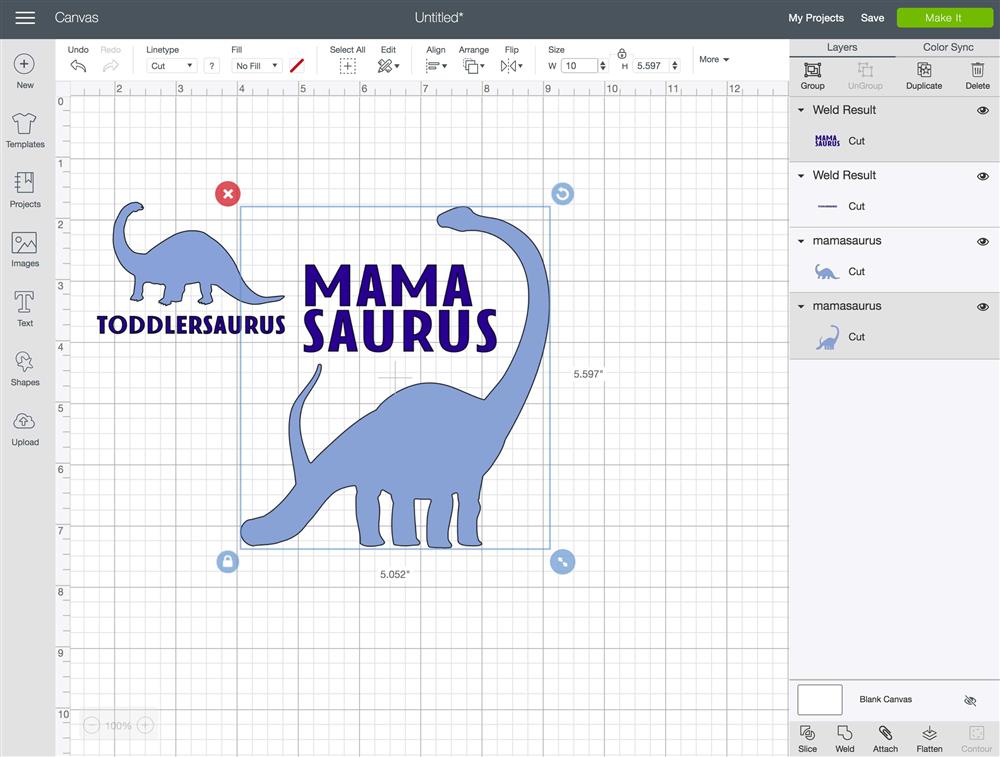

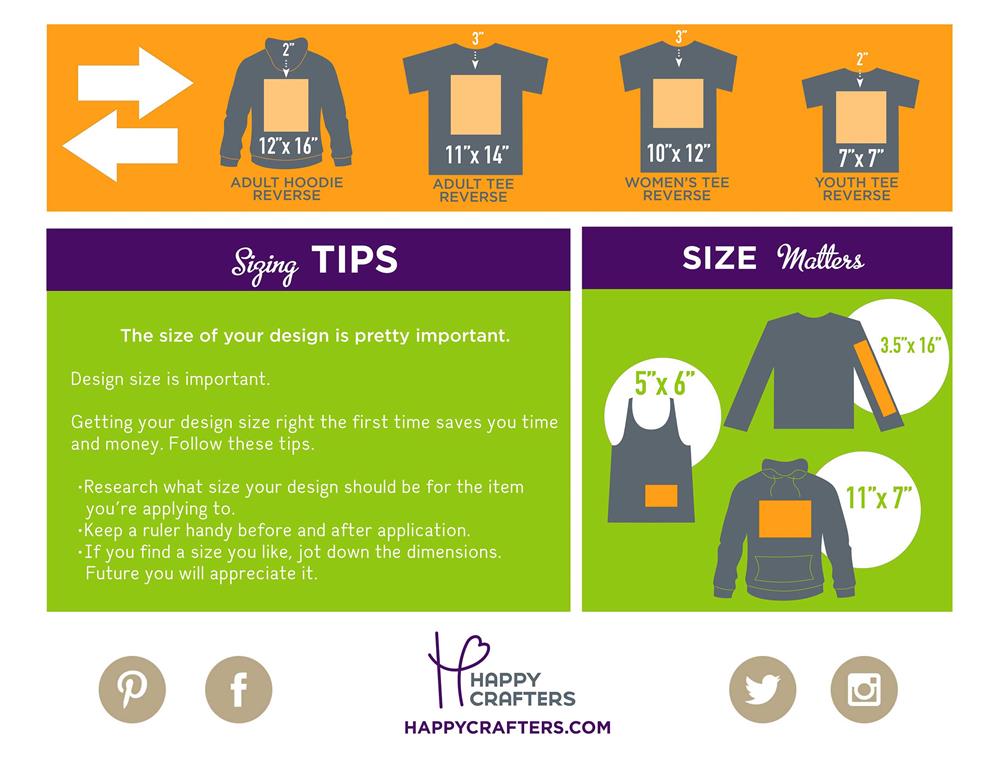
Some of the most common questions that we get from people new to working with HTV are things like “How big should I make a shirt design?” and “How much vinyl do I need for a shirt?” This guide is a great starting point for answering those questions. For example, we recommend sizing women’s fit tops sized s-xl to 10” x 12” and children’s tees to 7” x 7” . I adjusted each design to fit just under our recommendations.
STEP 2: CUTTING AND WEEDING


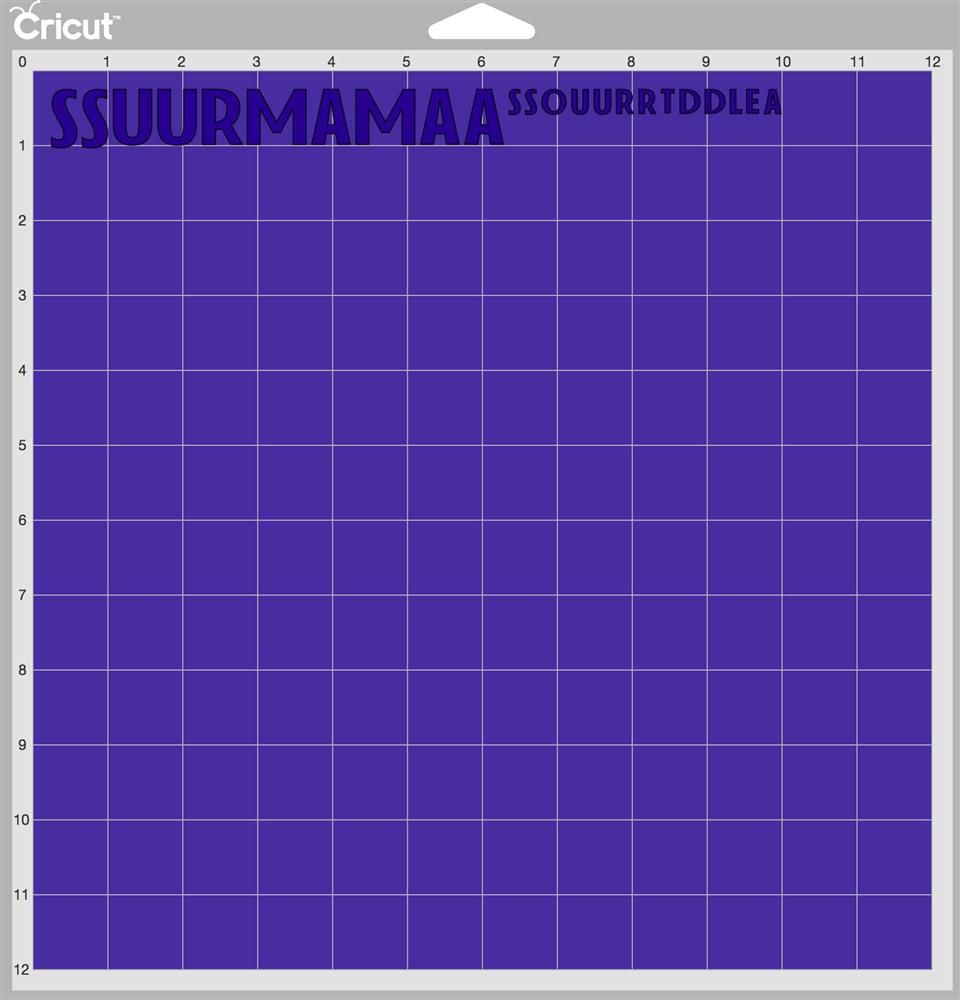
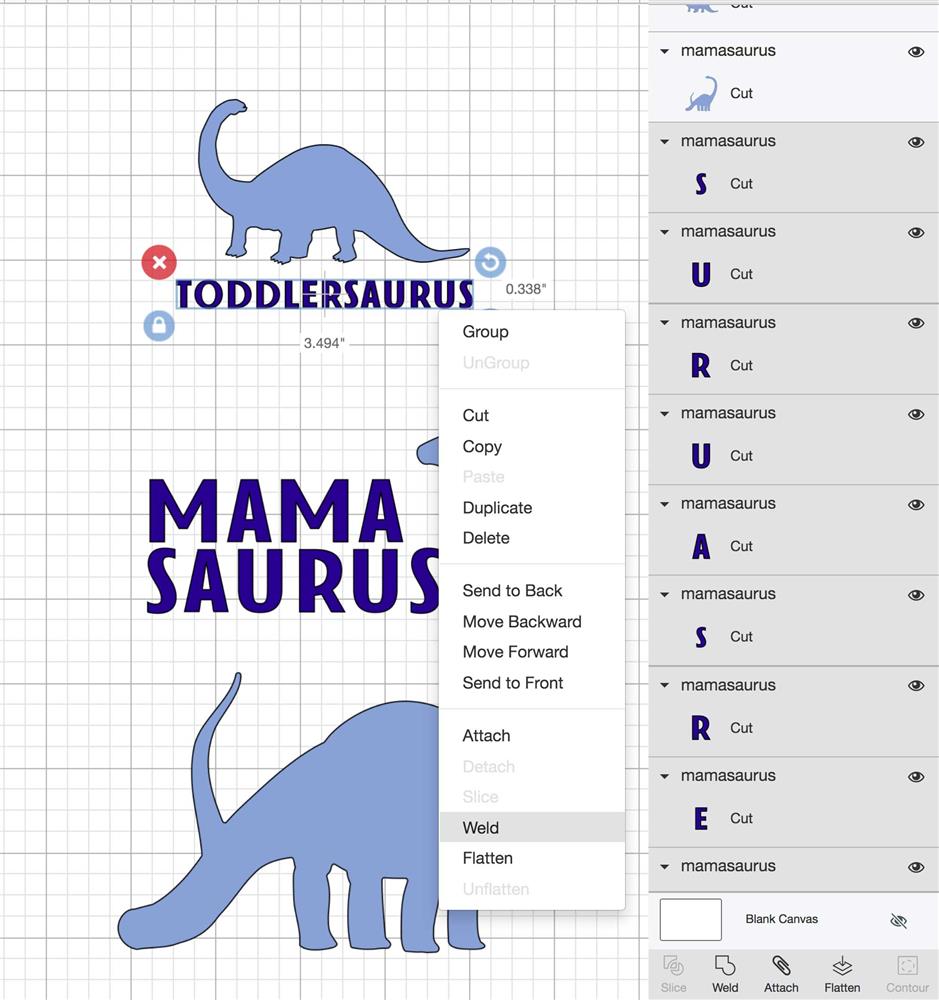
One of my favorite things about Cricut Design Space is that it automatically sorts your layers by color. One of my least favorite things about it is that it also wants to automatically arrange your text to save as much space as possible. To prevent the software from dividing up my letters, I selected all of my text and pressed the “weld” command. This made it so that Design Space was able to read it as one piece and will therefore made arranging my final cut design easier.
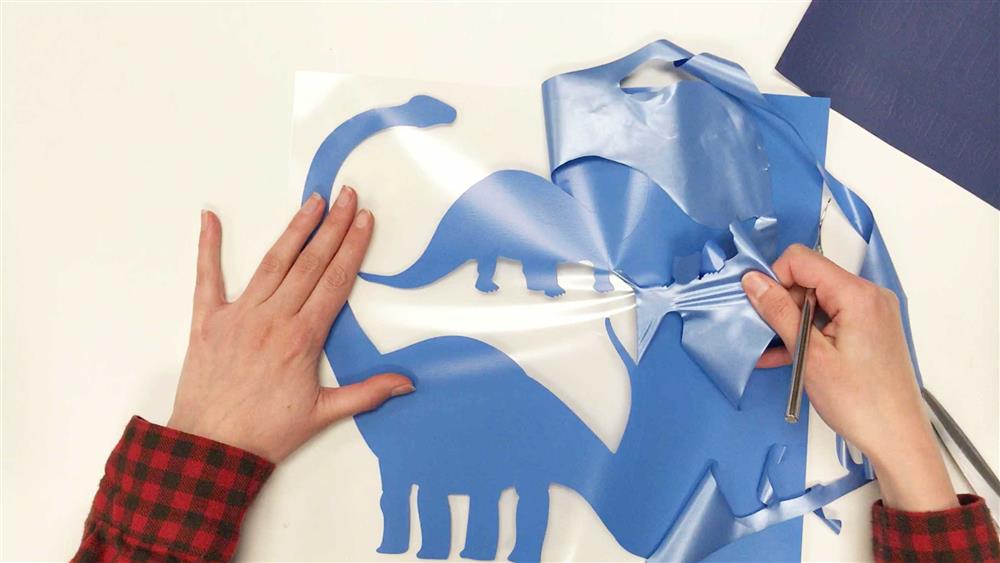
For this project I worked with Siser Easyweed Electric. To cut this type of vinyl, I placed it shiny side down onto my cutting mat. I then set my cutter to the “Iron-On” setting and made sure to select “mirror” in my on-screen settings. When finished cutting, I weeded away the excess vinyl for all layers.
STEP 3: APPLYING HTV WITH THE CRICUT EASYPRESS
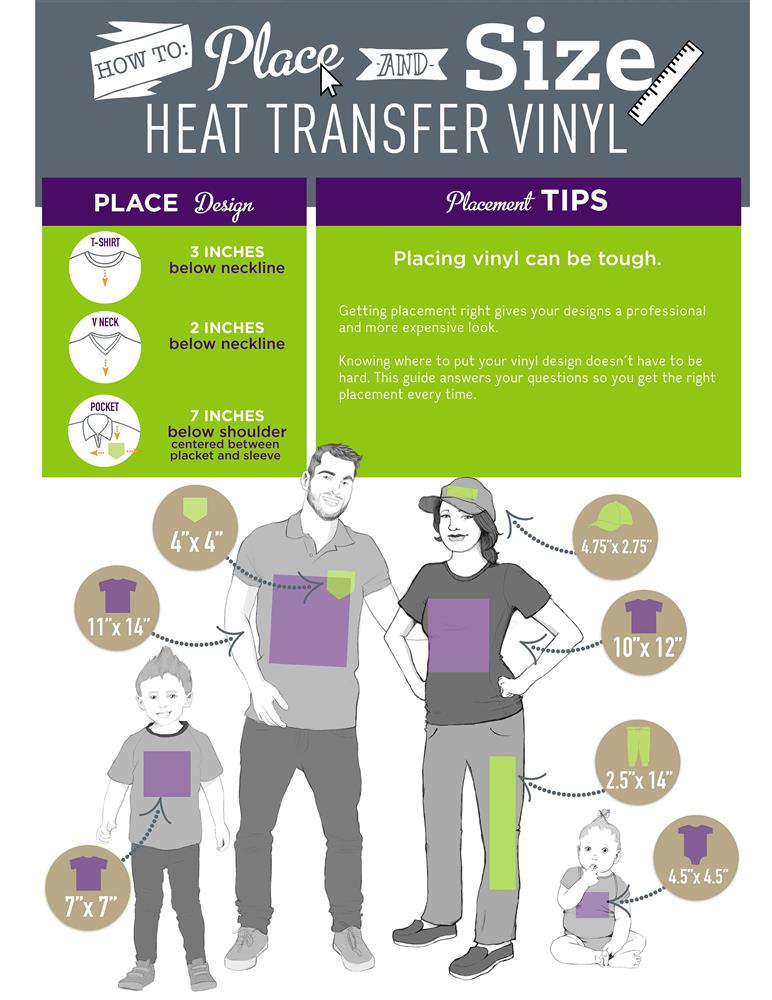
Once all of my layers were cut, I set up my workspace and allowed my EasyPress a few minutes to warm up. I set my EasyPress between 310-315º (you’ll want to set it 5-10º higher than what you would normally press your HTV at). Once the EasyPress was up to temperature it beeped and the indicator light also changed from red to green. I made sure to double check the placement of my weeded design by using my sizing chart (for a high collar shirt we recommend the design be 3 inches below the neckline; only 1-2 inches for a low collared shirt like a tank or v-neck, see above).
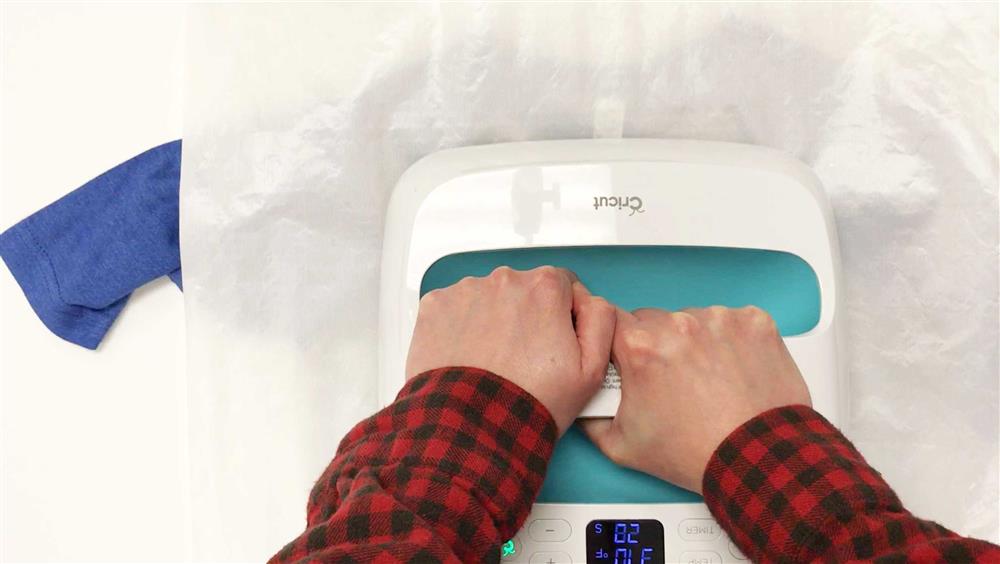
I then pressed each layer with my EasyPress for a full 30 seconds, making sure to adjust and re-press any areas that I may have missed. I then pressed each shirt from the back for an additional 30 seconds. If the material is moderate to thick, I recommend flipping it inside out for the second press. One thing to keep in mind when using the Cricut EasyPress is that it functions more similarly to an iron than to a heat press so always remember that pressure is key! Luckily the EasyPress is both larger and heavier than a standard iron, making your job a little easier. One way to test if your HTV has adhered properly is if you can see the texture of the garment beneath it faintly coming through (see below). If you have doubts, re-pressing your item can help but make sure to keep a watchful eye on it so as to avoid scorching your vinyl or your item. Remember to use a cover sheet once you have removed the protective carrier sheet!
Can you believe that it took less than 30 minutes to put together this adorable pair of matching shirts? If you’ve created any super cute matching sets for you and your family make sure to share them with us! And as always if you have any questions regarding our products and how to apply them with an EasyPress, Iron or Heat Press reach out to us at hello@happycrafters.com or give us a call at 1.888.888.4154.
Until next time!
-Elisha