I am an avid Amazon shopper, and recently a new prime member! Amazon is a great resource for all kinds of vinyl crafts and was the first place I browsed for my latest project. Unfortunately, the last shipment came in a little-unexpected ;). What I thought I was ordering were full-size mason jars, what I got was about half the size. As a crafter, you are always having to think on your feet and this happened to be the perfect happy accident!
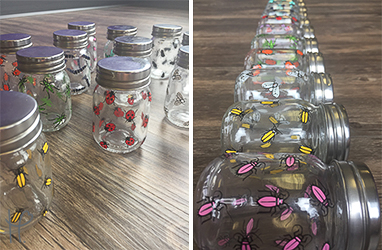
After the initial shock of the size and a new lesson learned, I immediately knew what I was going to make. With summer still in full swing, I wanted to create a set of jars that would catch those backyard bugs we all remember as children.
What did I use?
Mini Jars
Silhouette Cameo
OraCal 651
Clear Application Tape
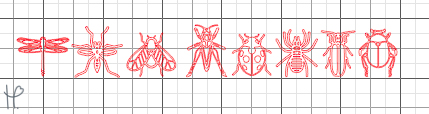
I started this project by finding a series of bug silhouette shapes that all complimented each other. I wanted to make sure that they all had a significant amount of detail. Ambitious, I know! I also made sure that all the silhouettes had a visible layer that I could separate. Once I had my bugs picked out I laid them out in Silhouette Studio and cut them using Black OraCal 651. After making my test cut and confirming the settings online, I had the first layer complete!
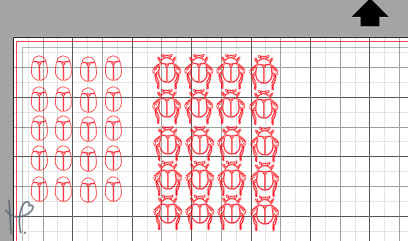
My second layer was the body color of the bugs, which I again cut out of the OraCal 651 series. I was able to separate the layers by releasing the compound path and selecting only the area I wanted to be cut out of the color vinyl.
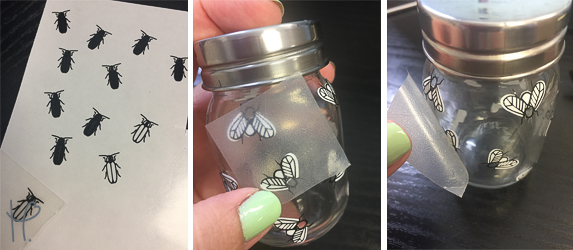
I now had all the layers cut and weeded, and was ready to apply them. The clear application tape was going to be the perfect tool! I used a strip of tape, then layered the black silhouette with the colored body to pick up the whole image. I then placed the bugs one by one to the jar, making sure the spacing was even.
This project did take a fair amount of time but was a lot of repetition, so every jar did get a little easier. I am very happy with the way these jars turned out and cannot wait to hear from you guys for recommendations on what else I can use them for!