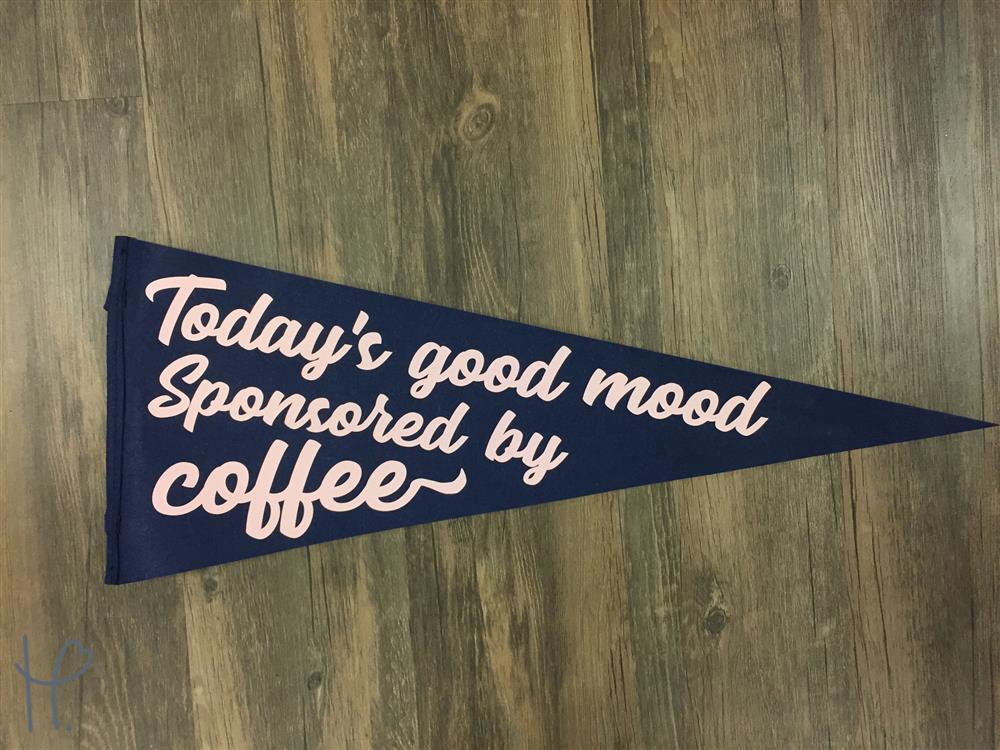
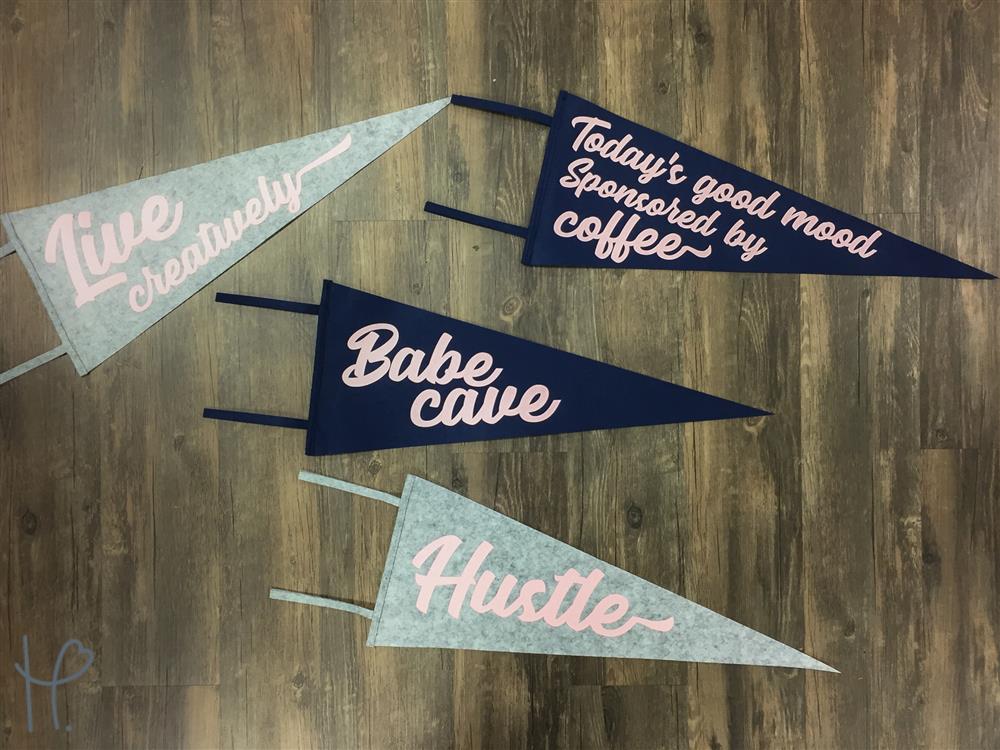
Have you ever wanted something really unique and personal for your home décor? There’s something specific you’re looking for but you just can’t find it? That’s exactly why I was thankful for my Silhouette Cameo and HTV! In the process of redoing my office, I knew I wanted something that fit my personality, was a unique mix of feminine and athletic, and wool pennants were exactly what I was looking for! I had searched high and low for some fun, light-hearted pennants that had a bit of a vintage feel. When I couldn’t find what I wanted, I decided to make my own!
What I Used:
• Standard Heat Transfer Vinyl – Princess Pink
• Silhouette Studio
• Seact Regular Font
I started by using this template provided by Wooly Town Pennants to create my designs. I could have measured out the actual pennants, but since they were awesome enough to create this template, I took full advantage. I brought the template into Silhouette Studio, traced it, and then sized that to the size the template said the banner was. This also allowed me to mock up my pennants before deciding. Since I could get a better idea of the finished design, it made selecting my fonts and phrases easier.
Once I had the template ready, I started typing out my phrases and selected the Seact font. I did do a little tweaking to the points of this font in Silhouette Studio to get the edges exactly how I wanted. I also warped and rotated some of the phrases to allow them to better fit the wool pennants. I originally planned on making these pennants a bit more masculine and had settled on a more vintage font, but I fell in love with the Seact font and couldn’t move past it.
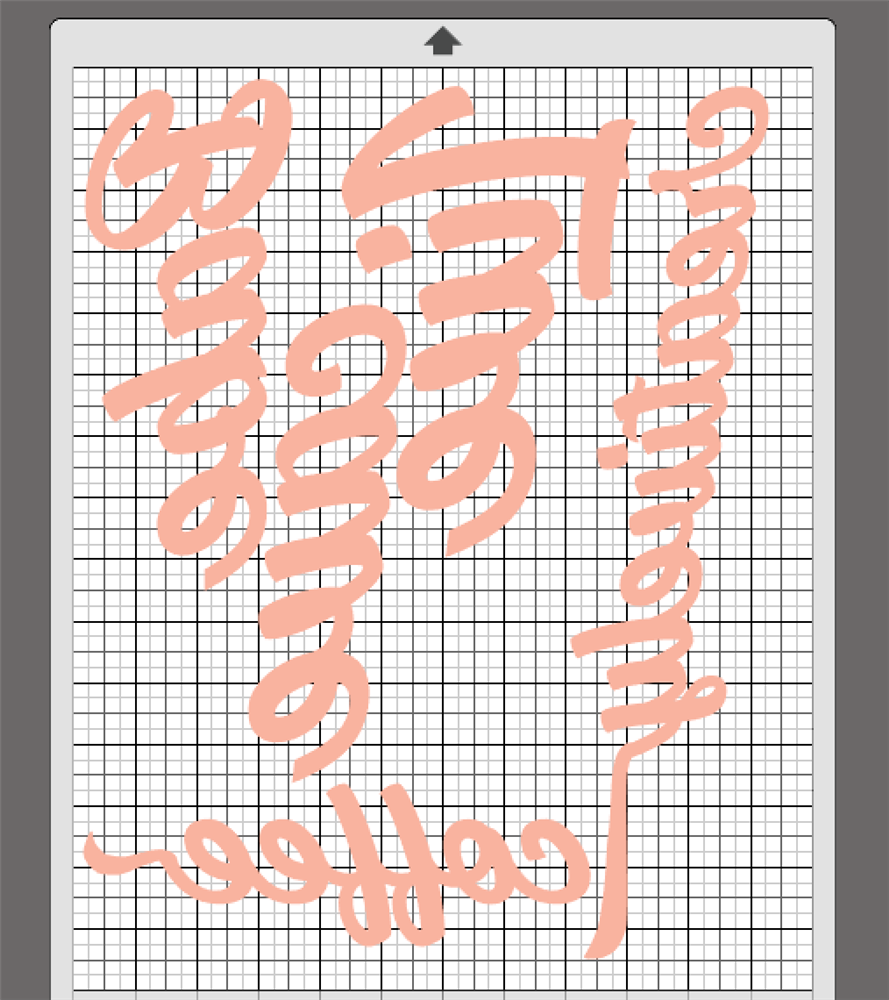
After finishing all four phrases, it was time to cut! Since the standard htv is only 12”x15”, I broke a few of the sayings up. This allowed me to fit more on one sheet than I normally would have been able to. Once my mats were prepped with vinyl and I was satisfied with my use of the space, I sent my designs to cut. The standard HTV cut beautifully with the settings blade 2, speed 8, and thickness 5. Remember, heat transfer vinyl needs to be mirrored!
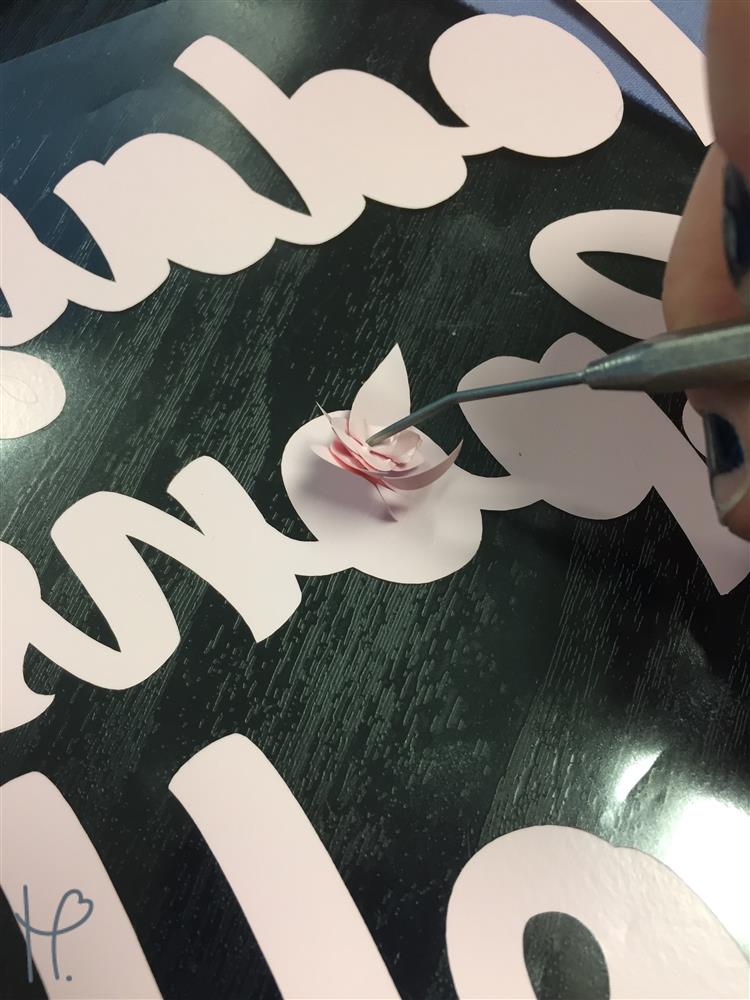
This project required two sheets of the standard htv, so I repeated prepping the mat and sending to cut for the second set of phrases. Then it was time to weed. These designs combined with standard htv weeded like a dream. There were no issues and the weeding process was over pretty quickly. I did remember to turn my Pink Heat Press on before I started weeding so it was ready to go when I was this time ;)
When it came time to press, some of my designs were larger than my heat press, but that wasn’t an issue at all. I pressed half of the design, then moved the pennant on the press, and pressed again. In this case, I did press both times for the full time and temperature. You’ll want to press for the full application since some parts of the pennants will only get heat pressed one time. I repeated this process on all four pennants.
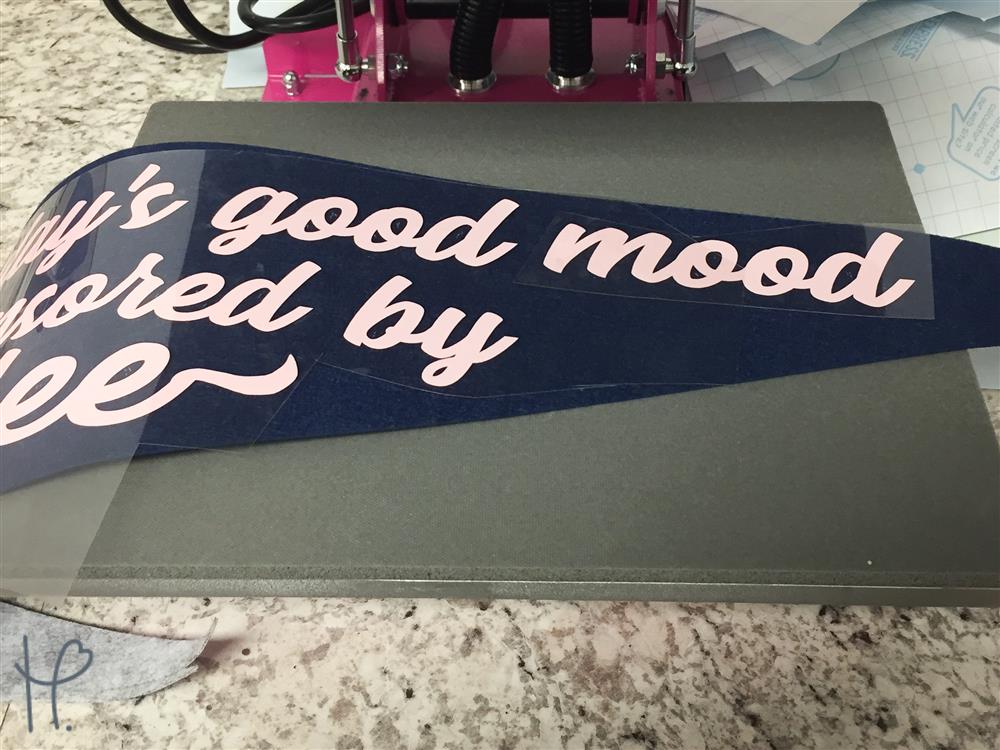
Standard HTV peels hot or cold. I could have waited until all four pennants were complete before peeling the carrier sheet but I’m far too impatient for that! I had to see what the finished design looked like.

Now, my new office has some pretty adorable and unique décor to fill some gaps in the wall I had before. If you want to make your own pennants or just want these sayings for another project, download them here!