Have you ever wanted to create a personalized duffel bag or gym with heat transfer vinyl? It’s a really easy way to dress up a cheap gym bag, or to offer a product that not only takes advantage of all the New Year’s Resolutioners, but also appeals to your sports customers as well!
Expanding your product line with products that compliment your t-shirts, cups, decals, etc is a great way to appeal to your current customers. If you’re creating a custom workout shirt and water bottle for one of your customers, why not also offer them a matching gym bag?
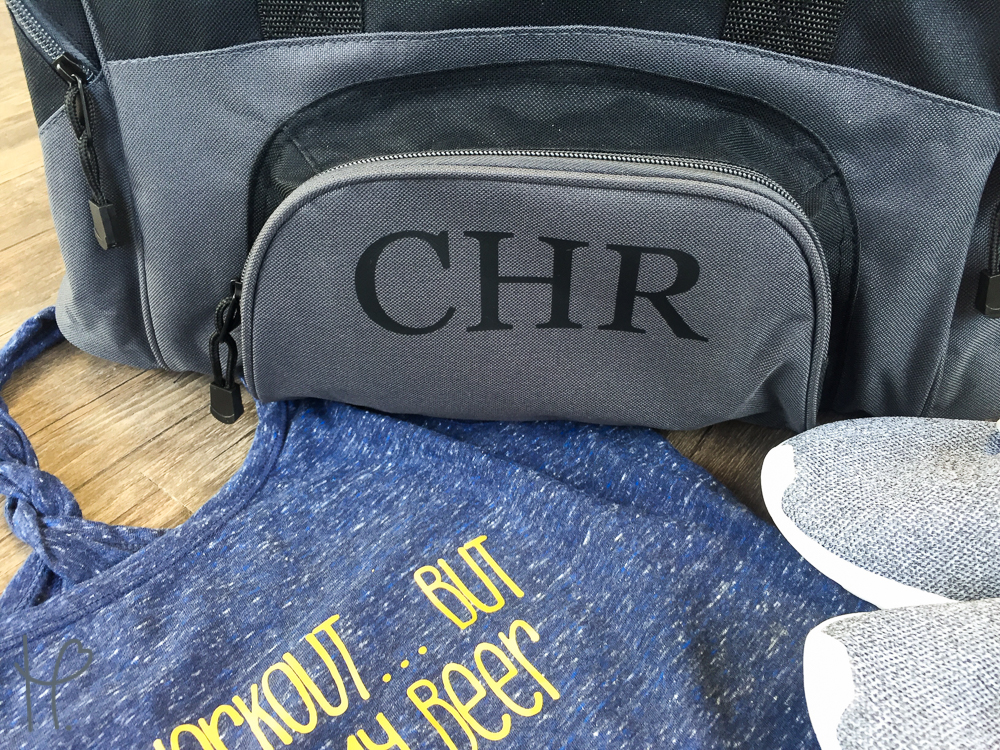
I was in desperate need for a new gym bag and the Port Authority® Small Colorblock Sport Duffel Bag was the perfect size for my need. This bag is plenty big enough for a change of clothes, shoes, a Dopp kit or toiletry bag, and more. I chose the black/dark charcoal colorway of this bag mainly because I didn’t want to have to worry about it showing dirt. I also didn’t want a flashy gym bag. I wanted to be able to personalize it, but still not be seen a million miles away ;).
What I Used:
- Port Authority® - Small Colorblock Sport Duffel Bag
- Happy Crafters Craft Perfect HTV | Black
- Silhouette Cameo 3
- Silhouette Studio
- Weeder Tool
- Pink Heat Press
- Heat Printing Pillow or Towel for Even Pressure
Step 1:
To get started, I decided on the duffel bag I would be applying HTV to and the heat transfer vinyl I wanted to use. Since I chose the black/dark charcoal version so that it wouldn’t be bright or flashy, I wanted to use a black htv to add my monogram, so it blended well. I love the matte finish that the Craft Perfect HTV offers so I had to go with it.
Since the Small Colorblock Duffel Bag is made of 100% polyester, there was no worry that the htv wouldn’t adhere. I could have gone with any htv for this project. Glitter HTV or even Standard HTV would have looked great on this bag.
Once I settled on colors, it was time to design and size the monogram. Keeping with the simple style I was going for, I settled on a very simple monogram. I didn’t want to do anything swirly or flashy for this gym bag, and that included the font. I wanted a more athletic, bold font for this monogram project, so I chose the simple font Georgia.
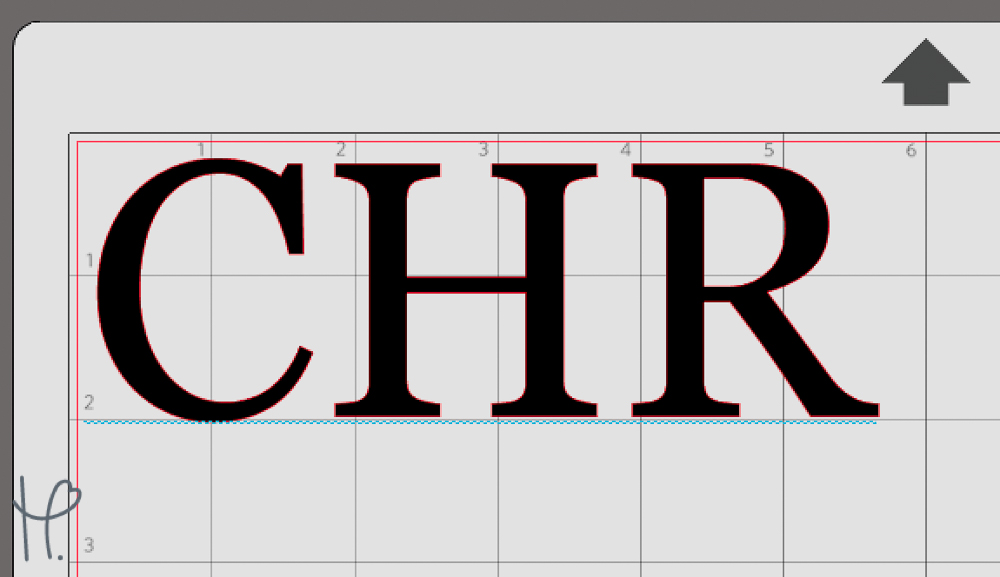
Instead of going with a monogram where the last name initial is larger than the rest, I decided to go with a more masculine feeling monogram. Typically, men’s monograms and monograms on gym bags are very neat and simple. This font allowed for the perfect monogram for this style.
Since this monogram was so simple, all I really had to do was type out my initials and size the design. There was no tracing, no welding, nothing of the sort!
Step 2:
Once I settled on a size, it was time to cut! I loaded my Craft Perfect HTV onto my mat, shiny side down. Then, I mirrored my design and changed my cut settings in my Silhouette Studio to heat transfer vinyl smooth.
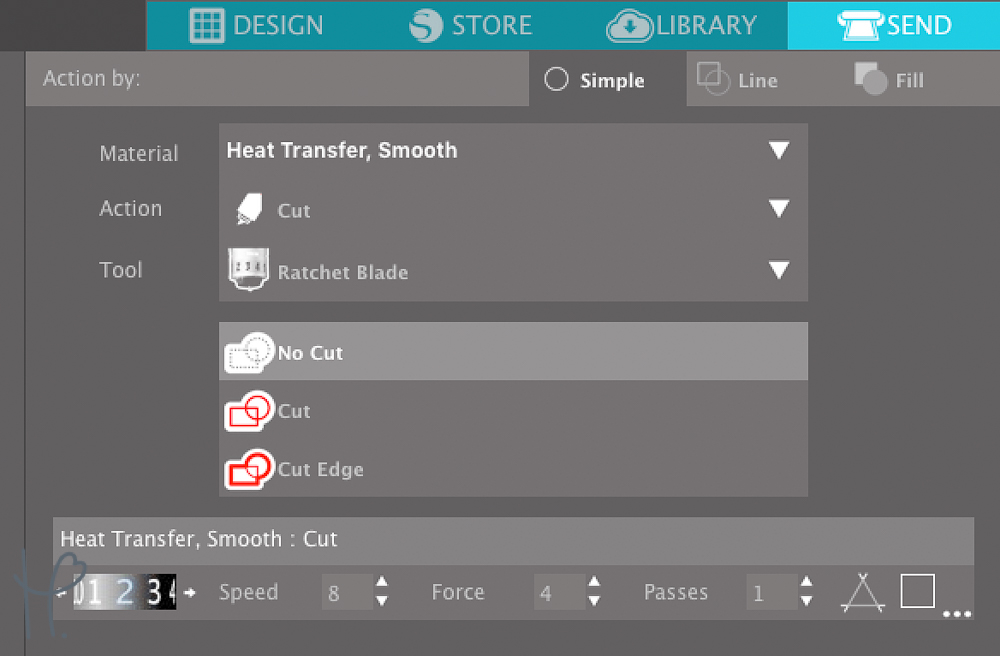
If you have the updated version of Silhouette Studio, it will ask you if you need to mirror your design when you select an htv cut setting. I prefer to manually mirror my design prior to this step and select “As-Is”. The reason why? When you choose “Send Mirrored” in Silhouette Studio, it will also move the design to the other side of the mat.
This isn’t a big deal if you are using a full sheet of vinyl, but if you’re using a scrap this can throw off your placement, especially if you’re cutting multiple colors at one time. It’s just a personal preference.
Step 3:
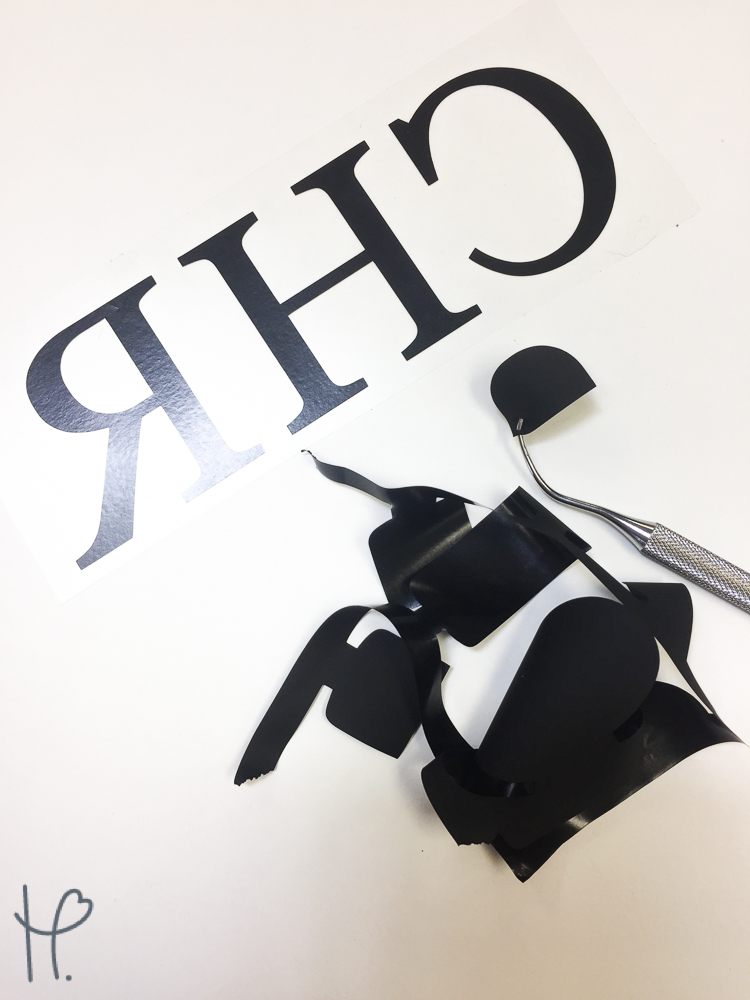
After my Silhouette Cameo 3 was done doing the hard part, it was time to weed. Craft Perfect HTV has a sticky carrier which helps hold down the vinyl while you pull away the excess. I find it easiest to weed if you start in the corner and turn your weeder away from you.
Since this was such a simple monogram, it only took a minute or so to weed, just another perk of a simple design.
Step 4:
Once I was done weeding my monogram, it was time to apply. I set my Pink Heat Press to 305ºF. The heat press only takes a few moments to heat up which is great. While it was heating up, I took a few minutes to adjust my bag on the bottom platen to correctly press the area I wanted to decorate.
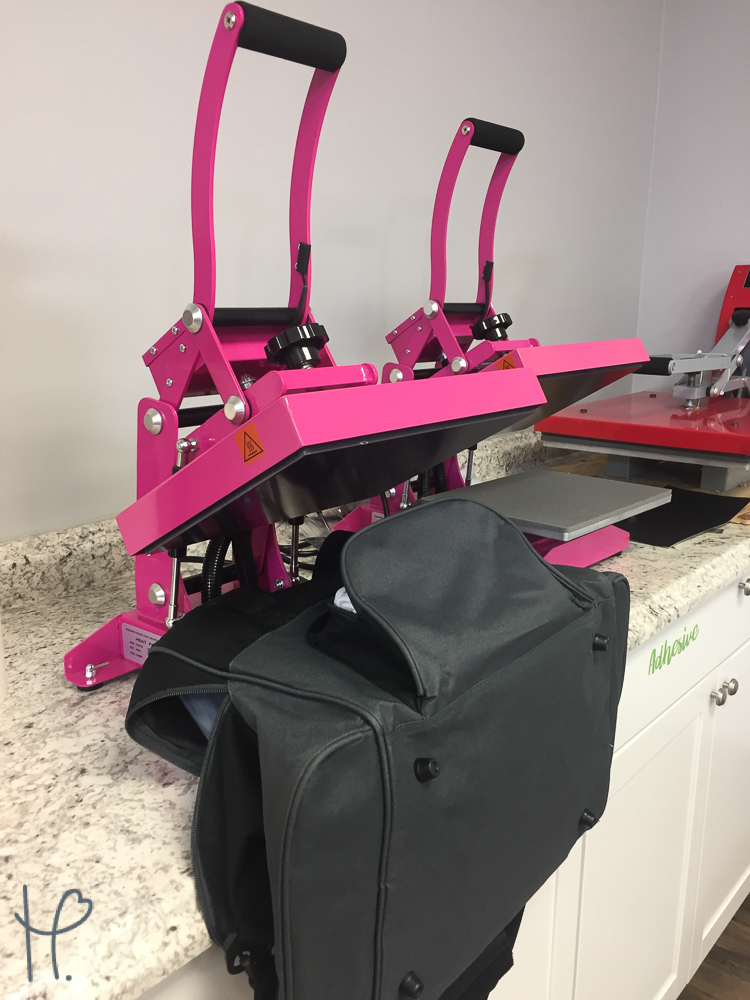
When you’re applying to a bag or anything with lots of seams, zippers, and raised edges, it’s a good idea to have a heat printing pillow on hand. Since I didn’t, I used a tea towel to fill the pocket I wanted to press.
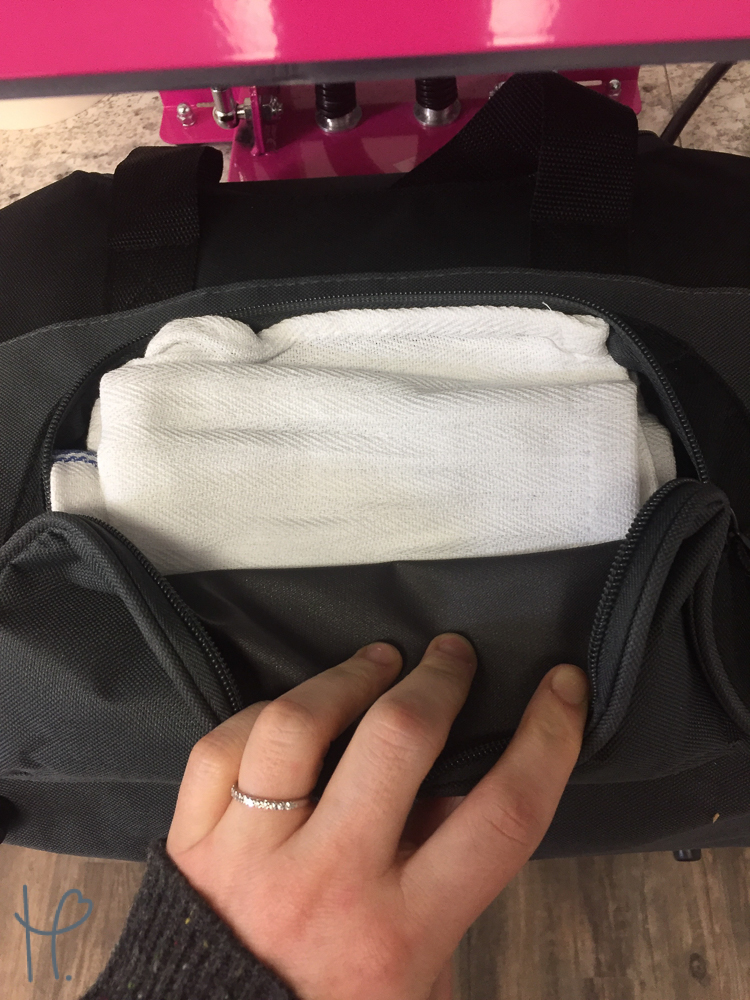
Using a tea towel is a little more work because I had to adjust the folds so that the area I was pressing was raised higher than the seams and zippers but had a flat surface. Once I was satisfied, I tested it by pre-pressing the bag.
Not only did this allow me to make sure the surface was flat and raised, but it released any moisture in the bag allowing the htv to adhere better. After this pre-press, I lined up my Craft Perfect HTV and pressed for 15 seconds with a medium pressure. Craft Perfect HTV is a hot or cold peel so I peeled it immediately after opening the heat press.
Finished Look!
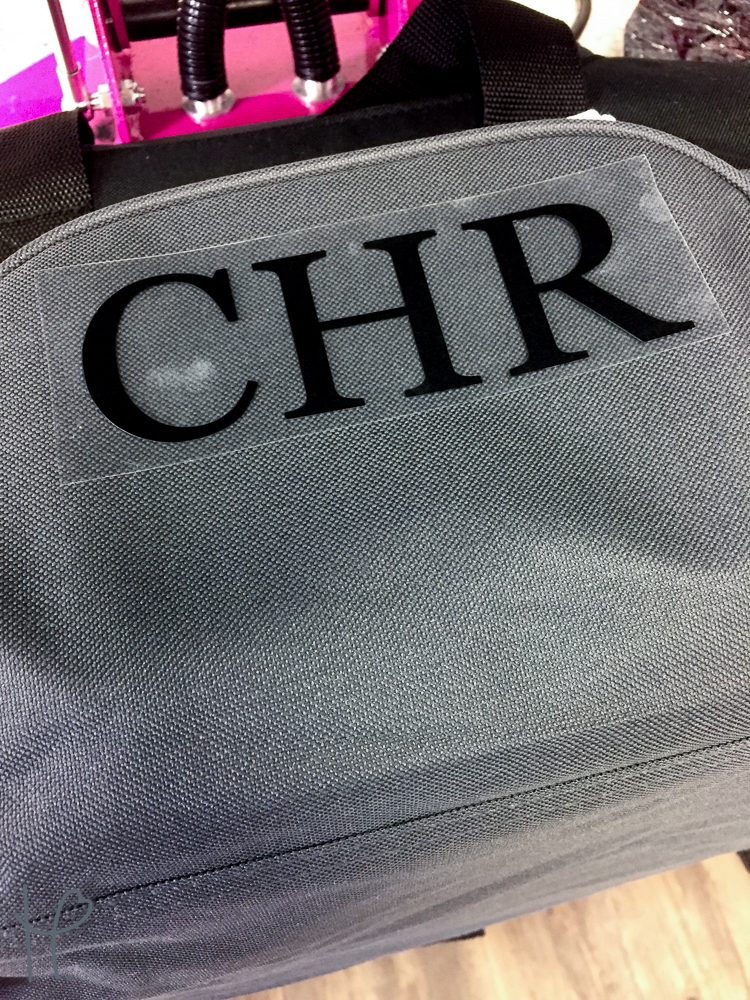
After peeling my carrier sheet, it was time to admire the finished product! This personalized gym bag is exactly what I needed for my trips to the gym after work. This project only cost around $15-$16.
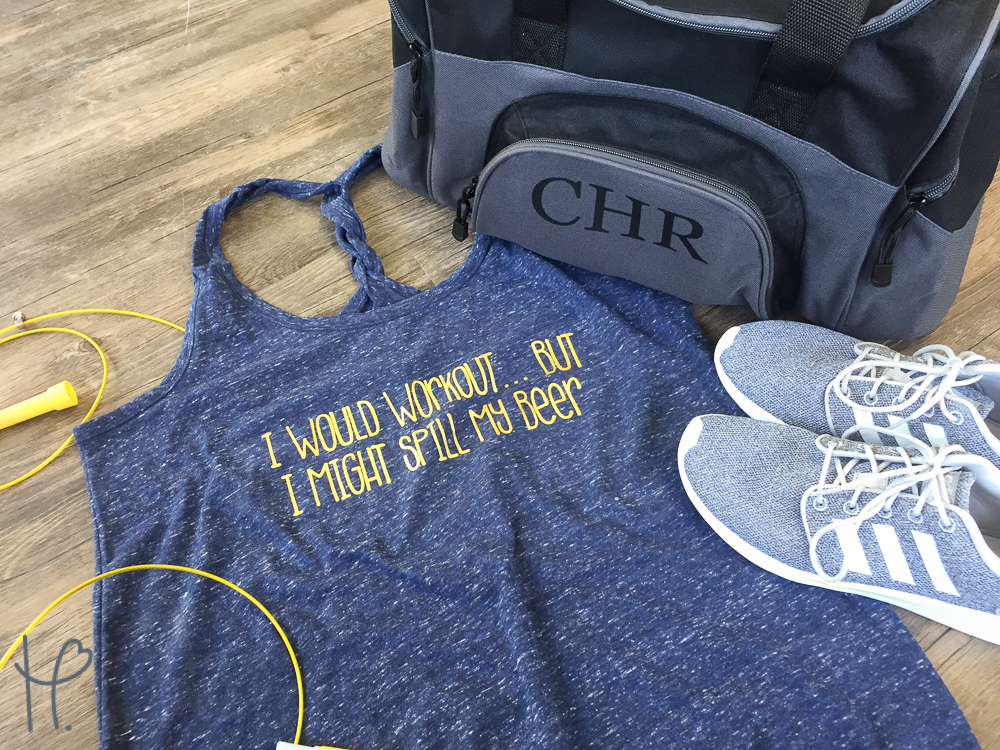
Had I been planning on selling custom duffel bags, I would have bought more than one which would have helped me get my cost down a little bit. Either way, monogrammed duffel bags in this style are currently selling on Etsy for $28-$30.
Since this project is such a quick project, coming in total with around 15 minutes of work total, there’s still a decent amount of profit to be made. Plus, these bags can easily be made using only your scrap drawer. Monograms are the perfect scrap buster projects and bags are no exception!
Who would buy this? Think about all the moms you are creating baseball, football, soccer, etc shirts for. Their children are playing sports and most likely could benefit from a customized duffel bag. Also, if you’re selling punny workout shirts, monogrammed water bottles, or even jerseys, duffel bags would complement your product line perfectly.

