


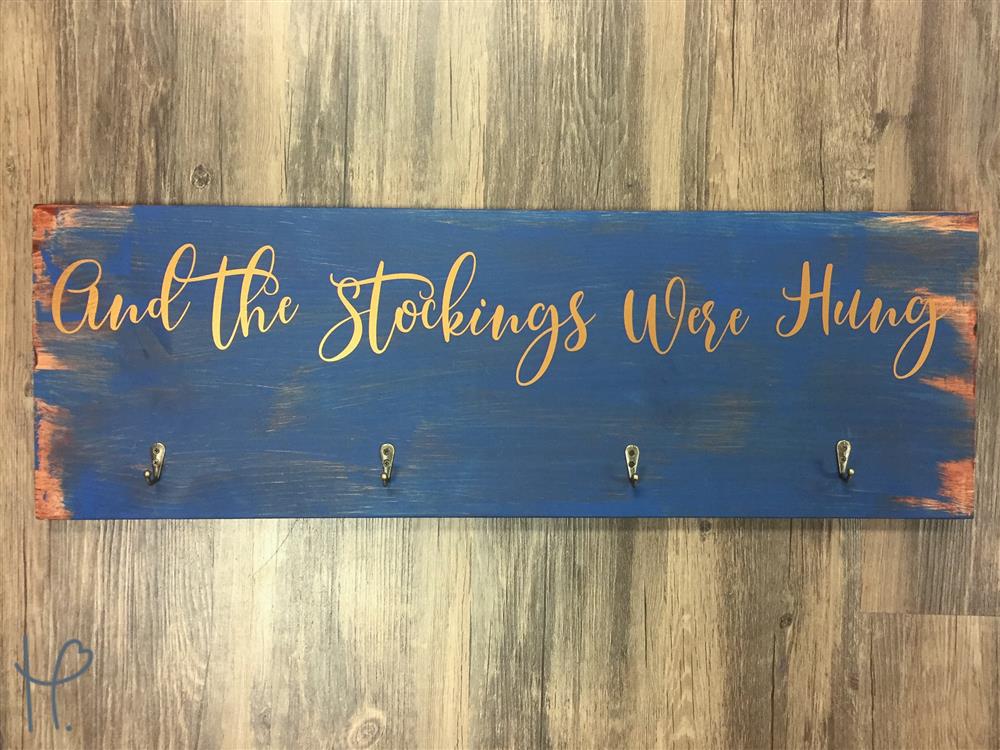
What do you do when you buy a new house but there’s no mantle to hang the stockings from? Well, you make your own stocking hanger with OraCal 651 adhesive vinyl and your Silhouette Cameo of course! Ok, I needed a few other supplies as well, but still!
When it came time to start thinking about Christmas I knew I wanted to make a few DIY Christmas decorations that would match our color scheme and style. Right now, it seems hard to find anything in stores that aren't farmhouse style, and while I absolutely love that style, it doesn’t fit the style of our new home. So, that being said, I did some searching and found something that would fit our style well.
What I Used:
- Piece of Wood (10”x28” cut from 10”x6’x1”)
- Polyshades Stain
- Navy Acrylic Paint
- OraCal 651 - Copper
- Hooks
- Screwdriver
- Weeder
- Lil’ Chizler
- Foam Art Brush
- Silhouette Cameo 3
- Silhouette Studio
- Paper Application Tape
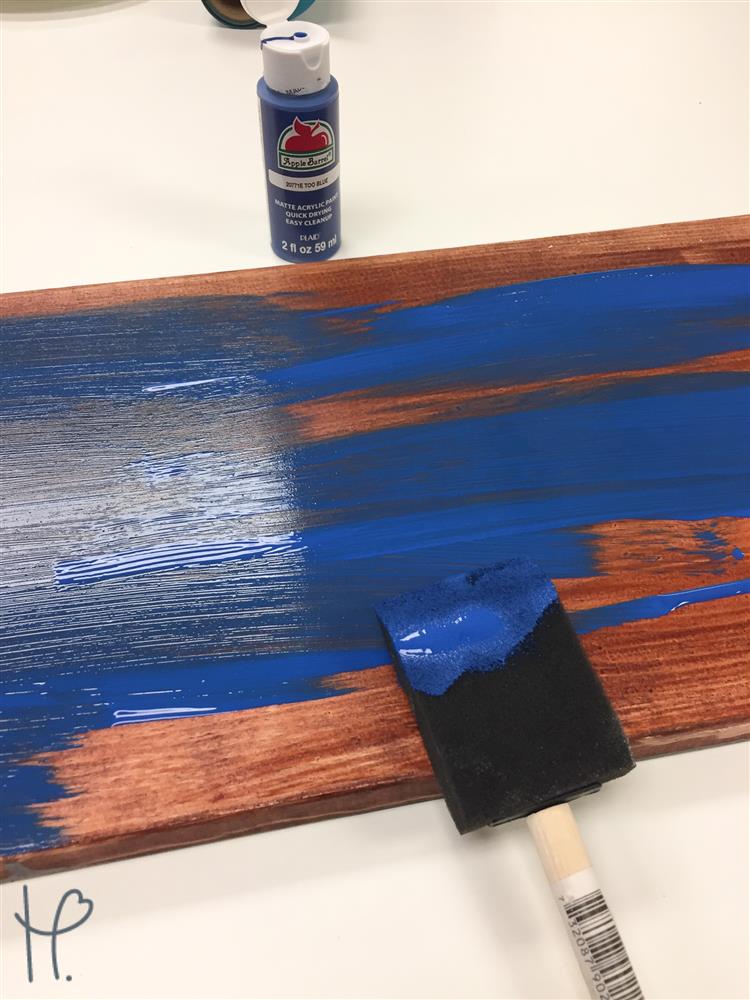
Since I needed to fit four stockings on my stocking holder, I wanted it to be long enough to put a little bit of space in between them. I started with a 10”x6’x1” board and had the nice guys at Lowe’s cut the board in a few different size pieces for me. I kept the extra pieces for projects I have planned later. Then, I sanded my board, dusted it off, and applied the Polyshades stain. I only used one coat because I liked the way that it looked. I then let my stained board dry for over 24 hours.
Once my stain dried, I haphazardly applied my acrylic paint to my wood using a foam art brush. I didn’t want a solid blue board. I wanted to make sure you could see the stain through the blue. Again, I stayed away from traditional Christmas colors for my design so that the stocking holder would match our furniture and walls. I really just love anything navy. ;)
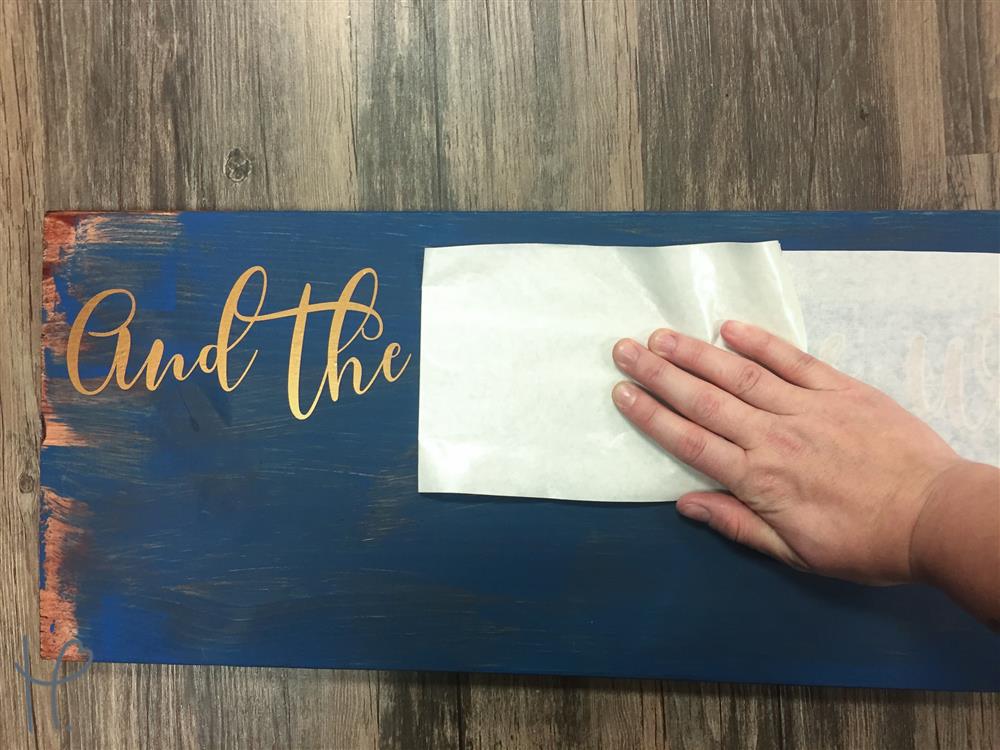
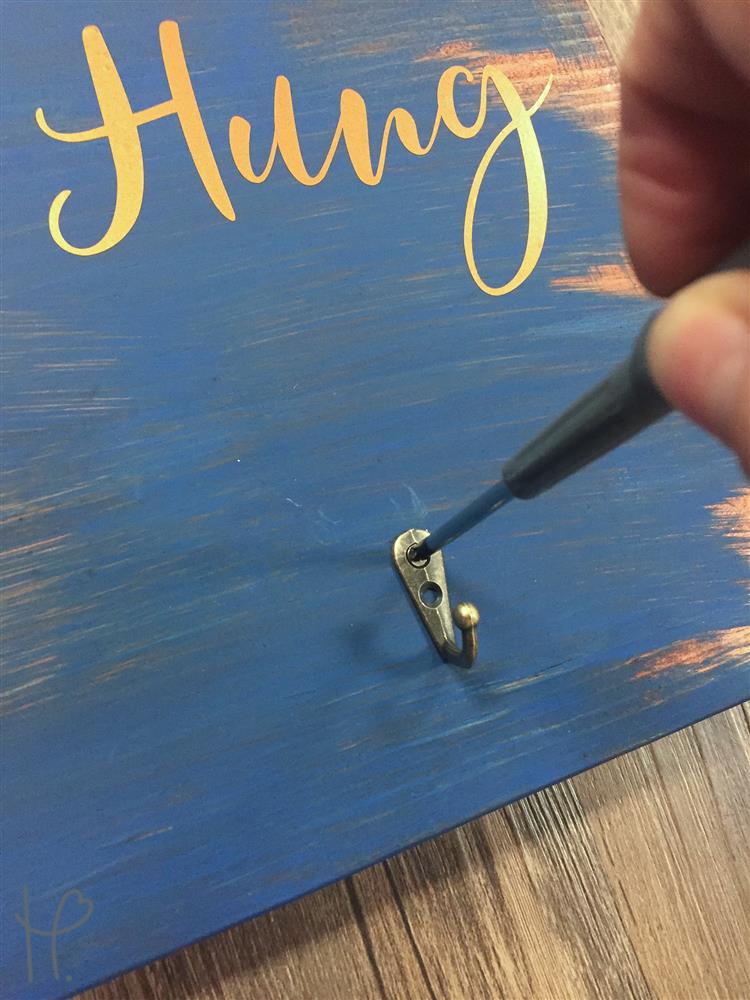
Once my paint was dry, I used Silhouette Studio and a font I purchased from the Hungry JPEG to create my text. I chose to go with the phrase “And the stockings were hung” because what’s more appropriate? You can download the cut file I used here. Once I typed and sized my font, I welded it so that the letters would not be cut individually. Then, I sent my OraCal 651 Copper to cut using the settings Vinyl, Glossy. Once the design was cut, I used my weeder tool to pick out all the cavities.
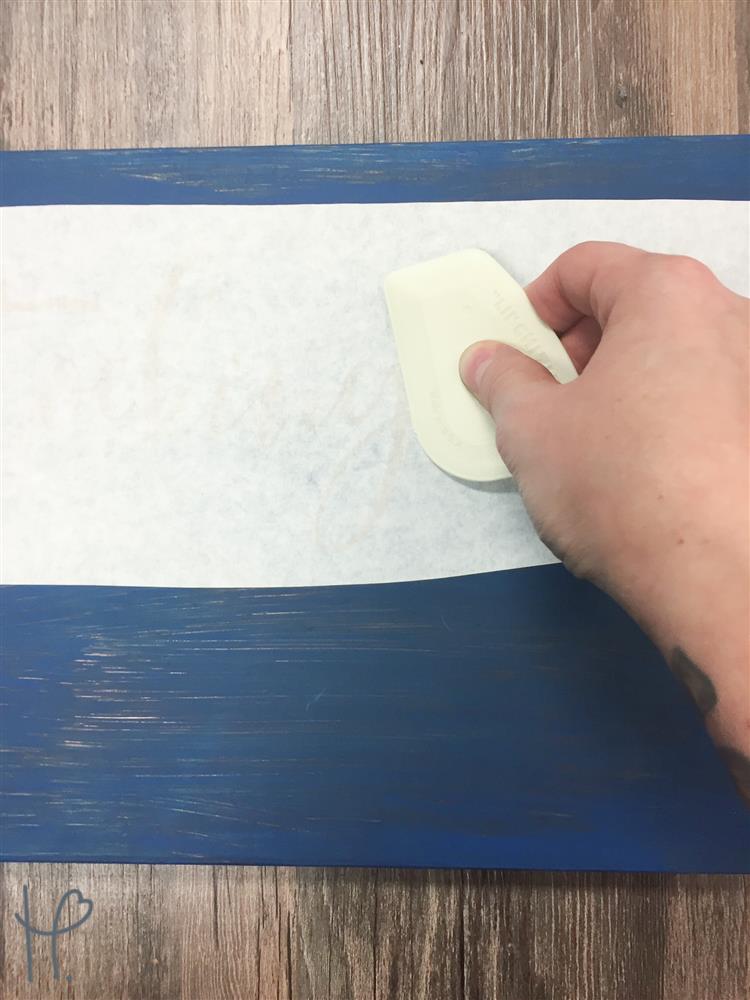
Then it was time to apply my paper application tape. I usually prefer to use clear application tape because it's easier to see through and it lays flat, but I was worried it would pull up some of my paint. Since paper application tape isn’t as strong, I figured I’d be safe, and I was! Once my tape was applied, I used my Lil’ Chizler to apply the adhesive vinyl to the wood. Then, since I used paper tape, I made sure to remove my tape my folding it back on itself at a 180-degree angle. If you ever have trouble getting the tape to release from your window or wood, this is the way to go. This allows you to push on the vinyl as you pull on the tape.
Now that my board was starting to look like something, it was time to attach the actual hooks that would hold my stockings. I found this pack on Amazon. I wanted something small and simple. This was a bulk pack so it was a little more expensive coming in at $6. I’m sure if I had spent some more time searching through Lowe’s I could have found a better deal, but this pack has enough to make plenty more stocking holders.
Altogether, I really only had about an hour in this project. That’s even with the staining, painting, and attaching hooks. Considering the going rate for this type of stocking holder on Etsy is around $30 for smaller versions and $45 for this size. I think we did pretty good! I really think you could easily get $30 for a stocking holder like this locally as well and easily at a craft show. You could even add names or initials to it and charge an additional $5 or so. Remember, you can generally charge more for a product if you are selling at a craft show or a boutique. Start high! It's always easier to come down than to go up.