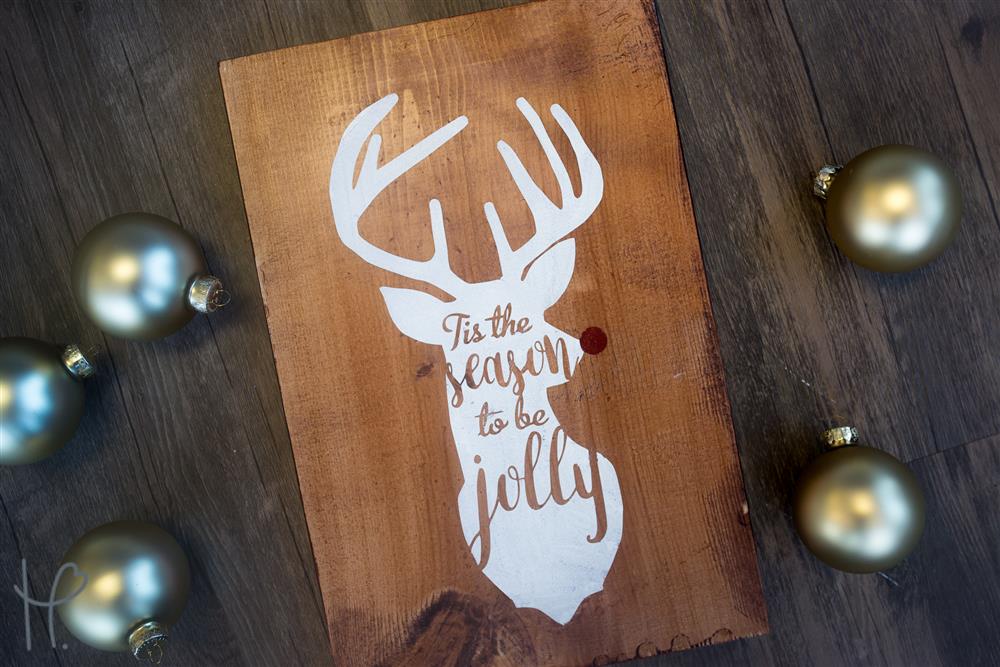
Have you ever wanted to create a wooden sign with adhesive vinyl but you didn’t want it to look so perfect or store bought? Sometimes I just want my signs to look a little more rustic than vinyl typically appears. That’s why I chose to use OraCal 651 as a stencil on a piece of wood for this project. When it comes to Christmas, I’m a lover of all things rustic and worn. I wanted to incorporate my favorite types of decorations in this project so that it would match the rest of my home décor.
What I Used:
• Acrylic Paint – White & Red
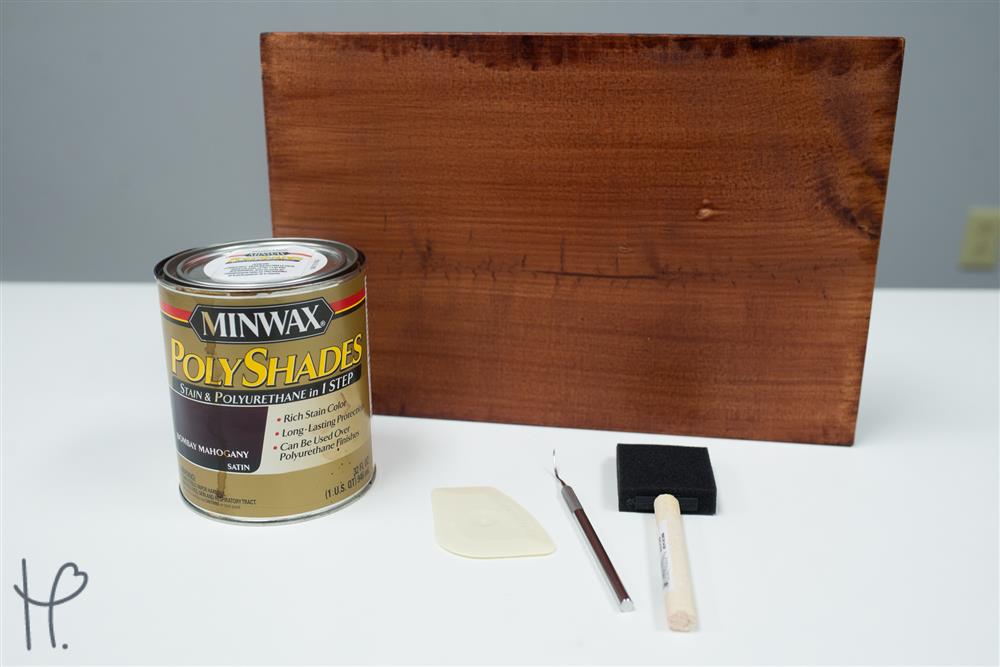
• 10” x 14” Board
• Polyshades Stain
• Foam Brush
• Weeder
Since I knew I would be using the adhesive vinyl as a stencil for this wooden sign, I wanted to make sure the cut file was easy to weed and work with. Remember, you’ll be weeding this in reverse, meaning, you’ll be weeding out what you want to be painted. I made the font a little thicker than the standard size by clicking and editing the points. I just wanted to make sure the vinyl was a thick enough piece to keep the paint from leaking under the vinyl. I also adjusted the cut file so that it would be easier to find the cut lines under the paint.
Once I was ready, I sent my reindeer to cut on my Silhouette Cameo 3. I chose adhesive vinyl standard or blade 1, speed 8, and thickness 5. When my Silhouette was done cutting, it was time to grab my weeder and weed! Again, I weeded out the areas that I wanted to be painted on the board. Then, I used the paper application tape to transfer my design to my wooden board. I chose to use the paper tape because of its lower tack. Since the board was stained, I found that the clear application tape was a little too strong in some areas of the design, but the paper tape released much easier. I used my Lil’ Chizler to apply the paper application tape to my design and then to apply the design to the board.
Now came the fun part, painting! I chose to use acrylic paint for my vinyl stencil project for a few simple reasons, it’s cheap and easy to find! I found my acrylic paint on sale at Hobby Lobby for $3! What a steal! Any acrylic paint will do, even the $0.70 acrylic paint you can get at Walmart.
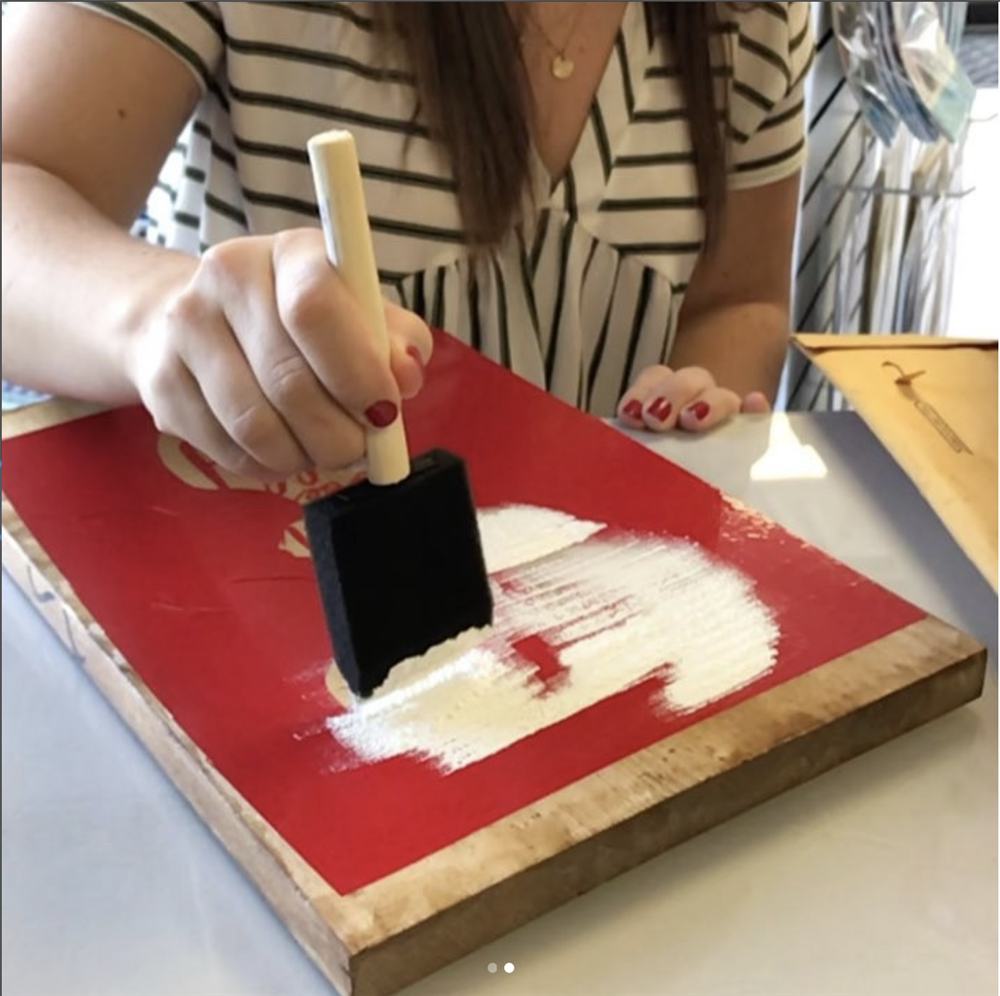
I found that the best way to avoid getting paint under the vinyl when using it as a stencil was to use a foam brush and dab the paint instead brushing it on. This not only gave it more of a textured look, but it avoided pushing the paint against the vinyl. Once I was finished painting, I immediately removed the vinyl. Removing the vinyl while the paint was still wet gave me crisp, clean edges. I started by removing the large outside border, then I took my weeder and carefully removed the inside pieces. It was a little difficult to see the vinyl but if I moved the board around a bit, the vinyl would catch the light and I could see a bit of a shine. Also, remember the paint is still wet. The only time I had any issues was that I bumped my wrist on the wet paint when weeding the inside. It was easily fixed but could have been avoided. Once I removed all my vinyl, I did go back in with a brush and touch it up a bit. I also took an X-Acto knife and touched up any edges I wasn’t in love with.
Now, this gorgeous piece of DIY home décor was made for myself, but if I were selling it, I think this board could easily sell for $20-$25. The board itself was cut from a 10”x 6’ board. That board made 5 pieces of wood the size of this sign and it only cost $10. As far as the rest of my cost of goods, a foam brush was $0.50 at Lowe’s, the acrylic paint was $3 but I only used a tiny, tiny bit, let’s say $0.10 because I’ll use that white paint for other things. We had $1.50 in OraCal 651 and maybe $0.15 in paper application tape. Of course, the stain was more expensive coming in around $12, but I bought a quart of that and so far, we’ve stained boards for 4 classes and still have ¾ of a can left. I think its safe to say we can factor in just a few cents for the stain cost as well. So while being generous, we’re under $5 for the cost. Once we factor in our time to cut, weed, and paint, this is still a very profitable project if you’re selling it.
Download this cut file to make your own! Then share photos with us on social media. We love seeing your projects. Need a little more help? Watch the full class on this subject below!