


New obsession alert at Happy Crafters! We recently launched a new permanent adhesive foil vinyl called Opal, and we just can’t stop using it. Every time a new product comes out we always have heart eyes, but this one might be the icing on the cake. The iridescent finish really takes it to another level! To top it all off it comes in 3 colors White, Blue, and Pink which makes it perfect for any application you need.
Okay, okay I will stop fangirling over here but let’s show you why I am so in love…
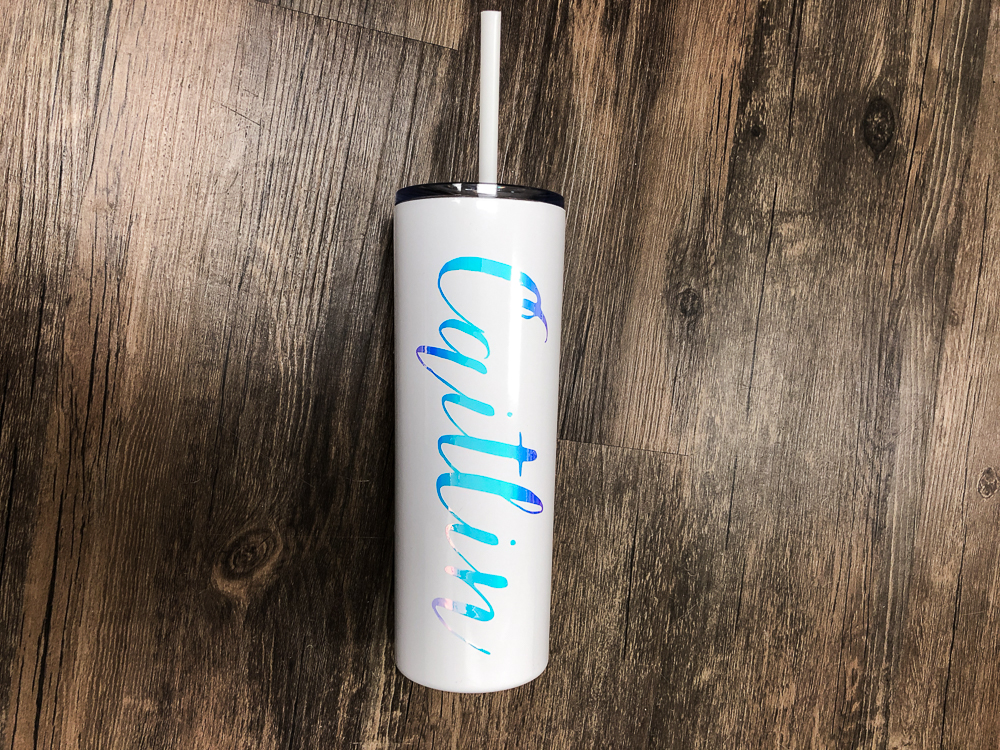
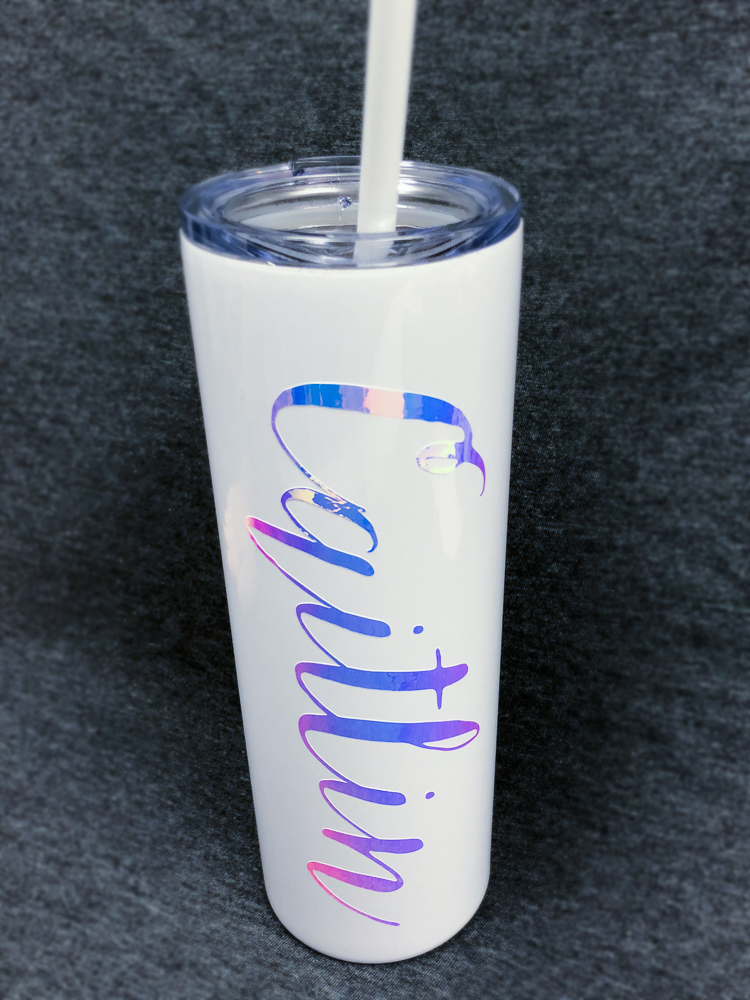
Isn’t this vinyl gorgeous?
Tumblers are already a big seller for most crafters, so why not add some flair? These personalized cups only take minutes to create but add so much value to your product. I chose to keep it simple by just adding a name down the side, but you can get pretty detailed with smaller shapes if you prefer.
So, start your timer and let’s begin:
Step 1: Gather your Supplies!
- Vinyl Cutter (we used a Silhouette Cameo 3)
- Scissors
- Weeder tool
- Application Tape (preferably clear)
- Lil Chizler Squeegee Tool
- Tumbler (Save a Cup)
- Opal Foil Adhesive Vinyl - We used White Opal
Step 2: Design
Since I decided to go with just a word down the side of the cup it’s always nice to spend a little extra time picking out the perfect font. To begin the browsing process, click the text tool on the left or right side of Silhouette Studio and type the word you will be creating.
Make sure you don’t get lost in the “font world” as I like to call it. I did have to cut myself off and eventually went with the font Violet Full which is a cursive with lots of character!
Step 3: Weld and Size
Select your text by clicking anywhere on the word until a box surrounds the image. Grab an edge and drag out until you have your desired size. I ended up going large measuring 6.5” long and 2.5” high making a bold statement. Just remember that size is preference so go with whatever you think looks best!
With the cursive text we had an overlap of certain letters, so we must make sure that we merge this together creating one seamless line. After selecting your image again right click and click weld, you will notice that all of the letters are now in separate groups and that’s okay.
Highlight by dragging over all of the text and create one group by right clicking and click “group”.
Step 4: Cut and Weed
If you ever get stuck and forget what settings to use just go to the product page of the vinyl you are working with and scroll to the bottom, or bookmark this link: https://www.happycrafters.ca/machine-settings.
This will break down everything you should know about all cut machines! Since we are using foil adhesive vinyl, we will need to make sure that the “vinyl glossy” is selected, then press send.
Voila, you now have your design cut. Once it has been unloaded from your machine trim the excess vinyl using scissors so that you can save the scraps for a future project. Start weeding by grabbing the top corner of the vinyl and pull back.
There were just a few cavities that I needed to go back and take out but not many.
Step 5: Apply
Round objects like this tumbler can be tricky if you are using a large object but we are here to give you some tricks to give you that perfect application. Place the application tape on top of your design like you normally would making sure that you have about an inch border of tape around the perimeter.
Use your Lil Chizler tool to scrape the top of the surface to allow the vinyl to attach to the tape. Once removed from the paper backing go around the edge tape line with scissors cutting a slit about every inch, making sure not to cut the vinyl.
With your cup lying flat, place the decal directly on to the surface. Take each section of your slit marks and go one by one pressing the top of your vinyl down.
Continue until the vinyl has fully applied to your cup and your tape easily comes off. The longer you leave the vinyl on the stronger the bond will be on your surface!
Times up! How long did it take you?
All in all, it probably took 15 minutes to create this one of a kind tumbler. With a little practice, you could probably get it down to 10 minutes which is a great project to produce in bulk. This item would be great for on the spot personalization project for any craft show. Try it out and let us know what you think!
Remember, Opal Foil Adhesive Vinyl changes color when the light hits it making it incredibly unique!