Fall is just around the corner! Before you know it there will be leaves covering the ground and pumpkin spice lattes everywhere! That’s why I decided to get a jump start on some fall crafts, and if you’re selling your crafts, you should start building stock now as well! Fall is definitely one of my favorite seasons. It’s also a great season for crafts. There were so many ideas floating around in my head I didn’t know where to start. Since I was having trouble deciding which craft I wanted to do first, I choose to go with the one that I already had supplies for, which was a burlap pillow, but I wanted to layer this htv to create a truly unique design that would sell at a higher cost.
What I used:
• Silhouette Studio
• Craft Perfect Heat Transfer Vinyl-Jet Black
• Metallic Heat Transfer-Autumn Leaves & Poinsettia
• Shine Heat Transfer-Gold Medal
• Burlap Pillowcase
• Scissors
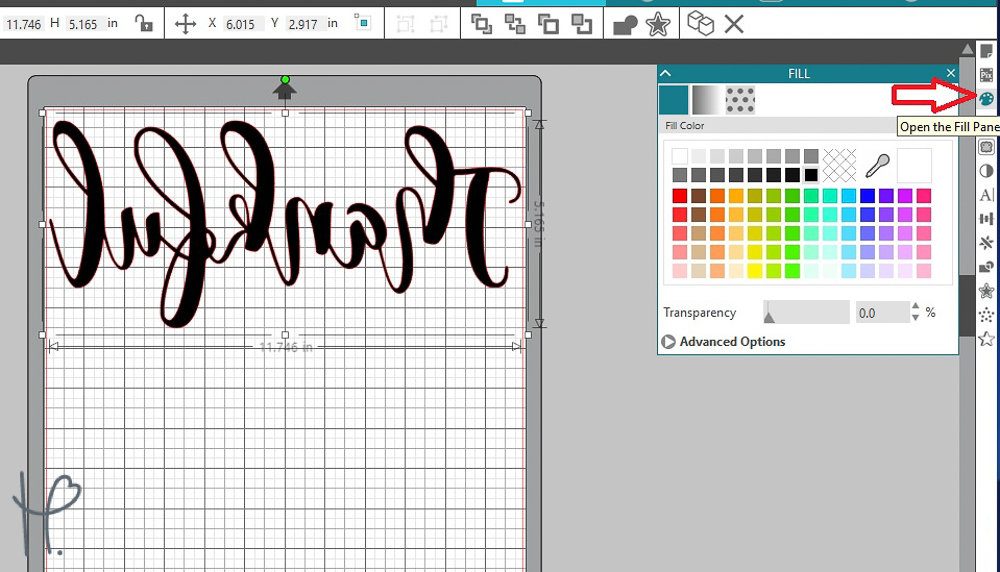
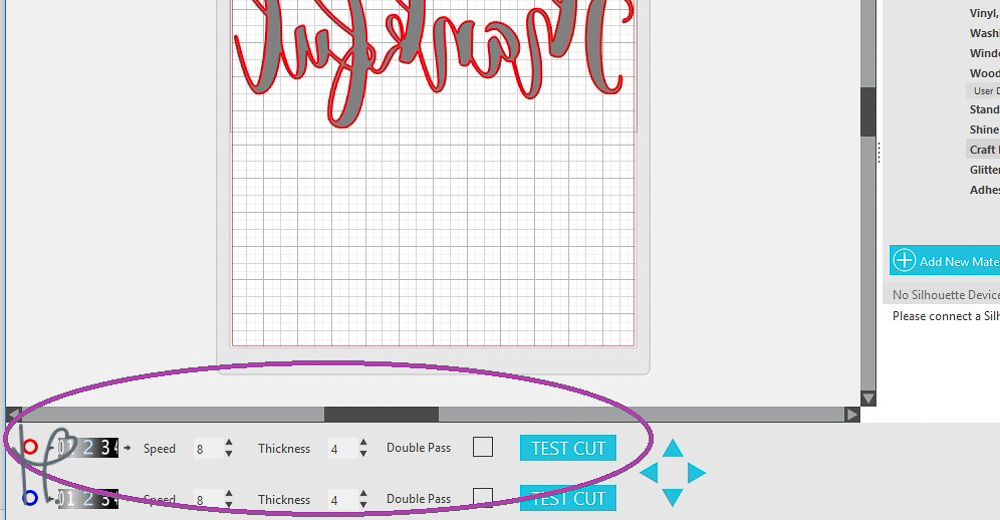
I started by typing the word “Thankful” in my favorite font “Magnolia Sky”. I then measured my pillow to see how big I wanted my font to be. After sizing my font, I filled it with black using the “Fill” tool. I like doing this so I can see what it will look like. It also helps when planning out the whole design. After that step, I clicked my mouse and chose “Flip Horizontally”, this is essential when using heat transfer. Once my design was ready, I sent it to my Silhouette Cameo 3 with the cut setting for our Craft Perfect HTV: Blade=2 Speed=8 Thickness=4. Once cut, weeding was a breeze. I set my “Thankful” design aside and programmed my pink heat press to 305º F to heat up while I worked on my feather designs in Silhouette Studio.
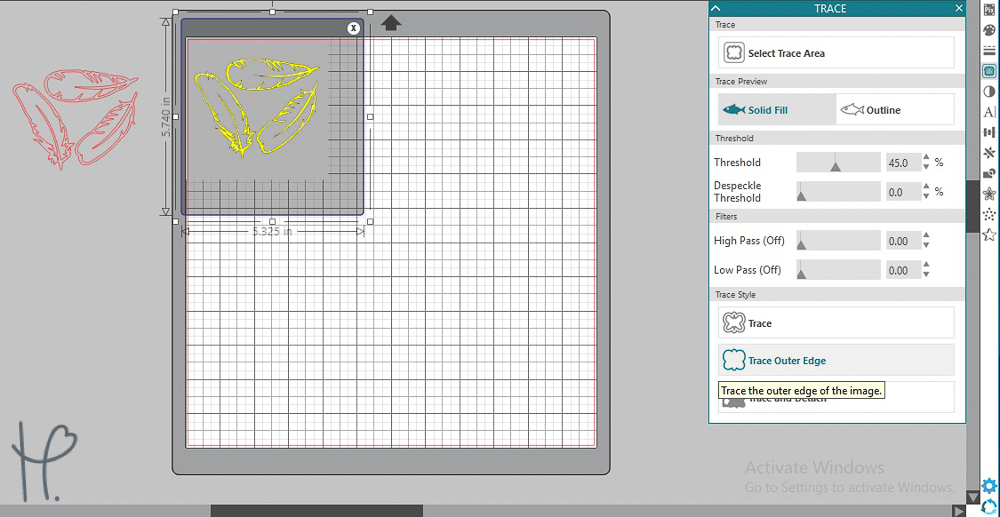
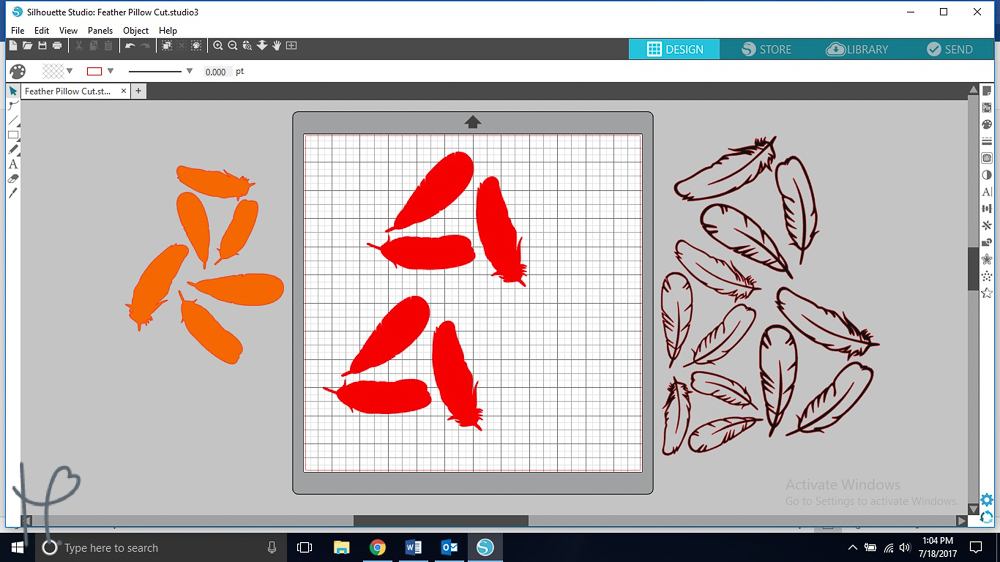
Since I wanted to layer my feathers, I traced my design twice in Silhouette Studio. Before tracing, I made sure to size my feathers to the size I wanted because after tracing it gets a little difficult to match the sizes perfectly. The tracing method I used was the trace style option “Trace”, this gave me my black feather outline. I grouped my outlines together and I moved them to the side and traced my image again. When tracing the second time I chose trace style option “Trace Outer Edge”, this gave me my bottom layer.
Now I was ready to cut them! I used the same Craft Perfect Heat Transfer Vinyl for my black feather outline as my “Thankful” design, so my settings were already set. I proceeded to cut out all my bottom layer designs too. I wanted three different color feathers so I cut them separately with the colors I chose: Autumn Leaves, Poinsettia, & Gold Medal. The Shine HTV in Gold Medal is a little thicker so I had to change my settings to Blade=4, Speed=8, Thickness=12.
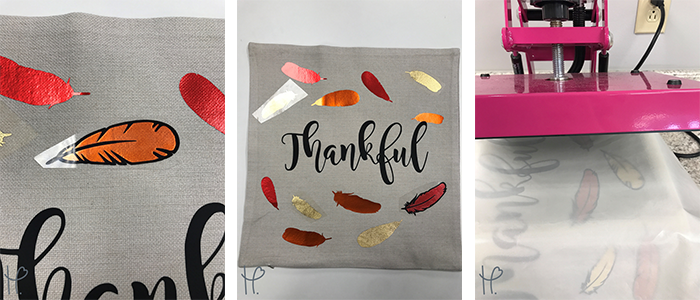
Once I had every design cut out and weeded I placed them on my burlap pillow to see how I wanted them arranged. After arranging them to my liking, I applied the feather fills first. I knew with the size of my little feathers and my big pillow case, working them under the heat press might be difficult. To make sure they stayed in place I used a household iron to get them to stick and make pressing with my heat press easier! Once I had my bottom layer of feather down, I peeled back their carrier sheets and carefully place the black outlines on top, pressing them in place with my iron. After all my feathers were heated into place, I began pressing them under the heat press. I always use a Teflon sheet just to be safe. I pressed my feathers at 305º F for 15 seconds. As soon as my feathers were done I placed my big “Thankful” saying in the middle, covered it with a reusable cover sheet and pressed!
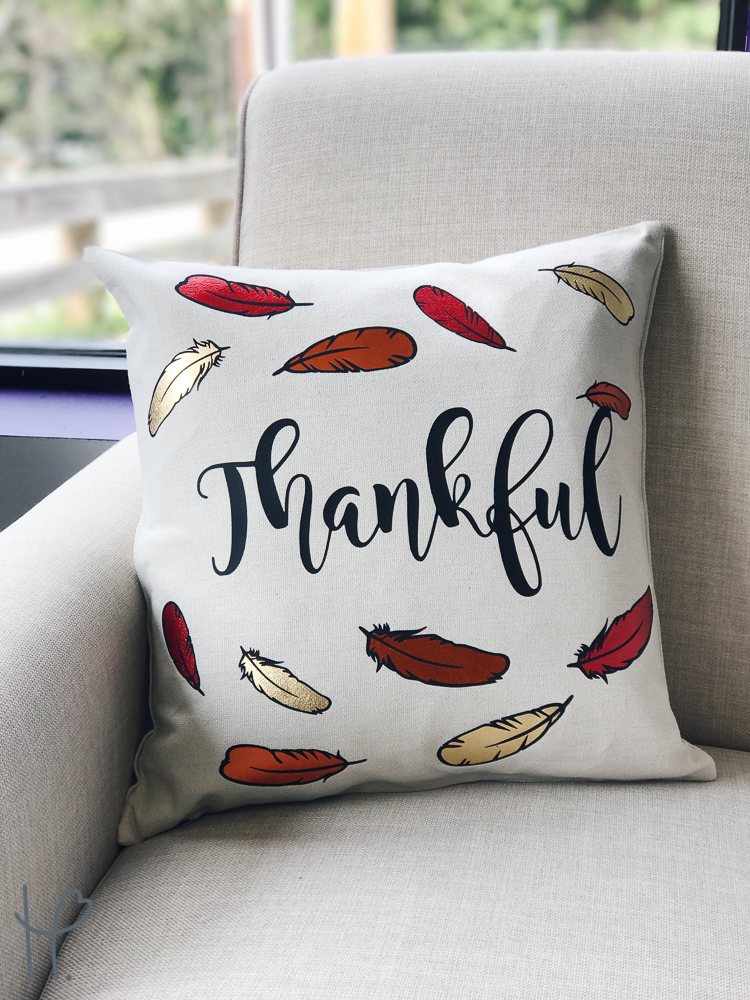
After all the cutting and pressing I finally had my finished project! I was pretty excited about how it turned out. I really loved the metallic fall colors I chose with the black outline on top. I would love to do more fall pillows, and would love to see what kind of fall crafts you all have up your sleeve!
Now that you saw how I made this pillow, click here to download this cut file for free! The best part is that this cut file comes with commercial rights. Feel free to create your own fall pillows, sell them at craft shows or even in your Etsy shop, or give them to friends as a gift.
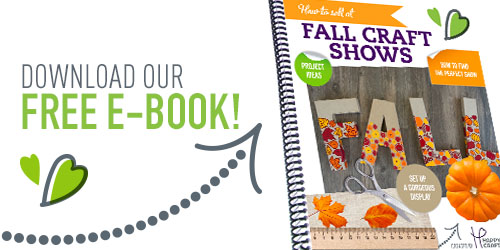
While you’re at it, download our free e-book below to learn how you can start selling at Fall Craft Shows! If you’re already selling at craft shows, there is an overwhelming amount of great information in this e-book that can help you improve your displays, profits, and packaging at craft fairs!