


Troubleshooting the 6 Most Common Struggles with Adhesive Vinyl
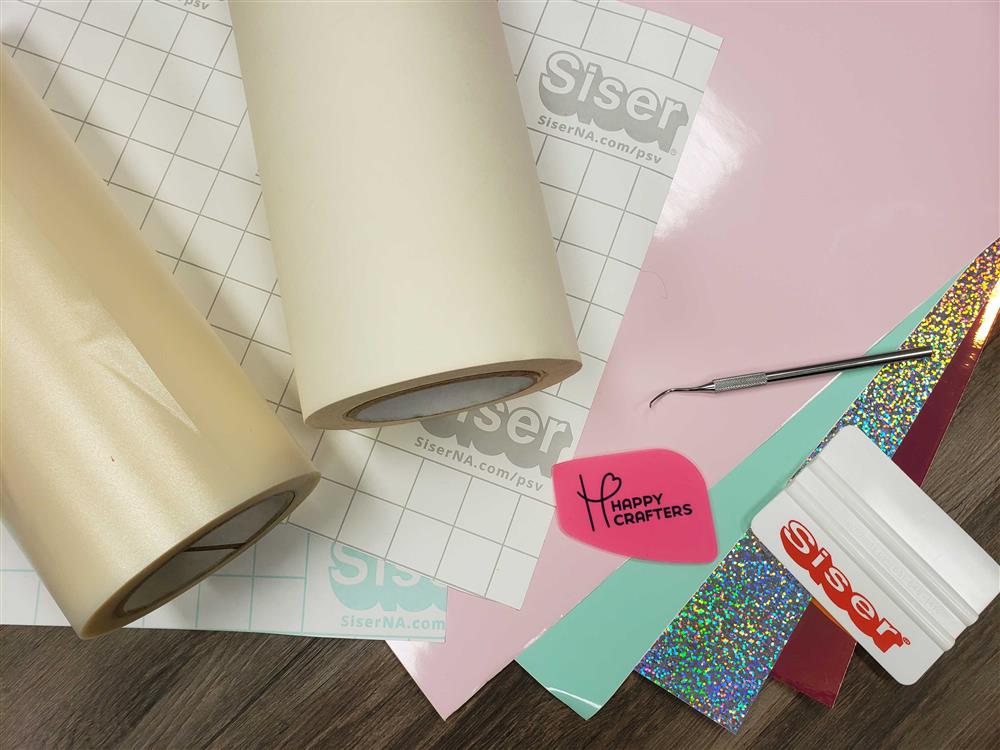

Nothing is better than being able to label a spice jar, personalize your water bottle, or even create a custom sign. All of these can be made possible with Siser® EasyPSV™ Adhesive Vinyl! But sometimes in the chaos of our projects, things can go wrong. Not only is it frustrating when problems occur, it oftentimes ruins your vinyl and can cost you a lot of money to fix it. But stress no more! Here are some quick tips on how you can troubleshoot the most common adhesive vinyl issues and save your project.
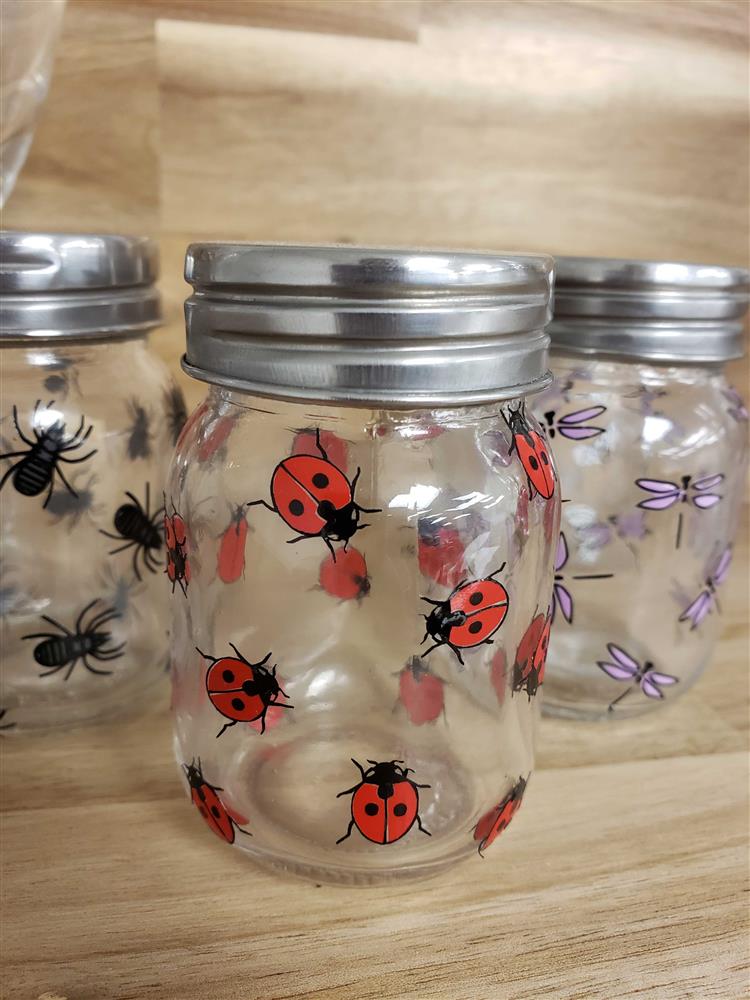
1. Your Vinyl Isn't Sticking to Glass or Metal Surfaces
Scenario 1: You just finished creating a cute decal that you want to put on a mirror, but when you go to remove the transfer tape, the decal does not stick to the mirror.
Scenario 2: You create a decal for a stainless-steel tumbler, but when you go to put it on the tumbler, the decal only sticks part-way thus misaligning your whole design!
Solution: Clean your surface extremely well with some rubbing alcohol. I mean really put that elbow grease into it! The oils from manufacturing and your hands create a residue that vinyl just does not like. If you are still experiencing some oily residue, you can also use nail polish remover. Make sure the surface is completely dry and untouched before you try to put your vinyl on.
Still having trouble? If you have cleaned your surface well with rubbing alcohol but your vinyl is still not sticking, try leaving the transfer tape on the vinyl for a bit after applying it onto the surface. Sometimes the vinyl’s adhesive needs time to adhere to the surface a little better and bond. Leave the transfer tape on after you apply your decal on the surface for about 10-15 minutes before you remove the tape.

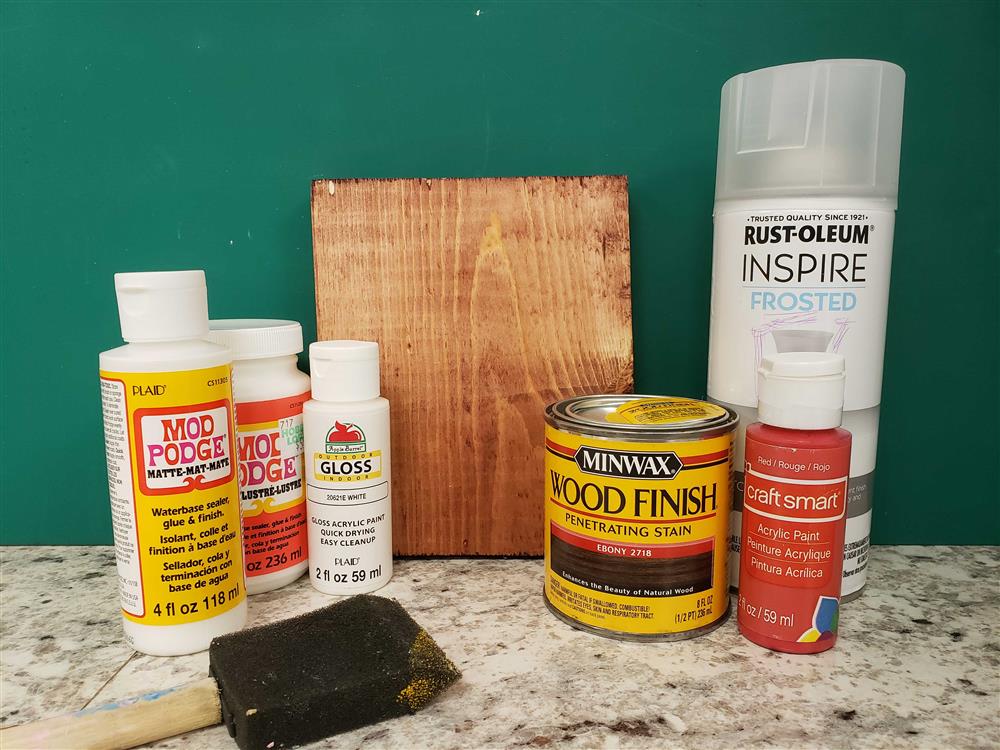
2. Your Vinyl Isn't Sticking to a Wood Surface
Scenario 1: You are working on a wooden sign for your wedding and your vinyl just will not stick to your wood surface
Solution: Adhesive vinyl is beautiful on wood, but uneven wood can be its worst nightmare. Make sure you are sanding and smoothing down your wood piece to remove any splinters, holes, knots, grooves, or anything that would cause an uneven surface. This will help a lot when you are smoothing down your vinyl too as you will not get stuck on uneven spots causing you to rip your vinyl.
Still having trouble? If your vinyl is still not sticking to your freshly smoothed piece of wood, adding a layer of paint or varnish will also help it stick. Sometimes wood just has too many loose splinters, dust residue, or nature elements that can stick to your vinyl instead. Adding a layer of paint, stain, lacquer, or varnish will help create a smooth surface that your vinyl will love!
TIP: Use a hair dryer or heat gun on the surface of the vinyl while applying it to the surface of the wood. It will help the vinyl conform to the slightly uneven surface a little better. You can also try using a tennis ball to rub the vinyl while you apply the heat, rather than a squeegee.

3. Your Vinyl is not Sticking to Your Transfer Tape
Scenario 1: You create a decal but when you go to pick it up with the transfer tape, the vinyl refuses to release from the backing paper.
Scenario 2: You create a decal, but only some of the letters stick onto the transfer tape while the rest are left behind on the backing paper
Solution: Your transfer tape might not be sticky enough. Not all transfer tapes are created equally. They all have different levels of adhesive tack. If your tape is not picking up your design, your tape is probably not sticky enough. For heavier vinyl types such as glitter and foils, you want to use astronger adhesive to pick up the heavier materials and different textures.
Still having trouble? As much as we all want to re-use and recycle our craft supplies, transfer tape can lose its stickiness as time passes. This also applies to those scraps of transfer tape we just cannot get rid of and keep re-using. After a while it may not have as much stickiness as we need. Try a new piece.
4. Your Vinyl Isn't Coming Off of the Transfer Tape
Scenario 1: You are trying to apply your decal to your favorite water bottle, and after rubbing it down on your cup for 5 minutes, the vinyl will not come off the transfer tape and release onto the cup.
Solution: If your vinyl is not releasing from the transfer tape then your transfer tape may be too sticky! If it’s too sticky, the vinyl will stay on the tape no matter what surface you are applying it to. Use a different tape that is not as sticky. Another way to help this, is to de-stick your tape. You can do this by sticking your tape on multiple surfaces before you pick up your vinyl. Some great places to de-stick your tape are, jeans/denim, blankets, or anything slightly fuzzy. You want a few of the fibers to stick to the tape to make it less sticky for your vinyl.
Don’t forget – Leave your vinyl decal on the surface for a few minutes and allow the vinyl’s adhesive to bond to the surface. After about 10-20 minutes, try to pull off the transfer tape again and see if you have better results.
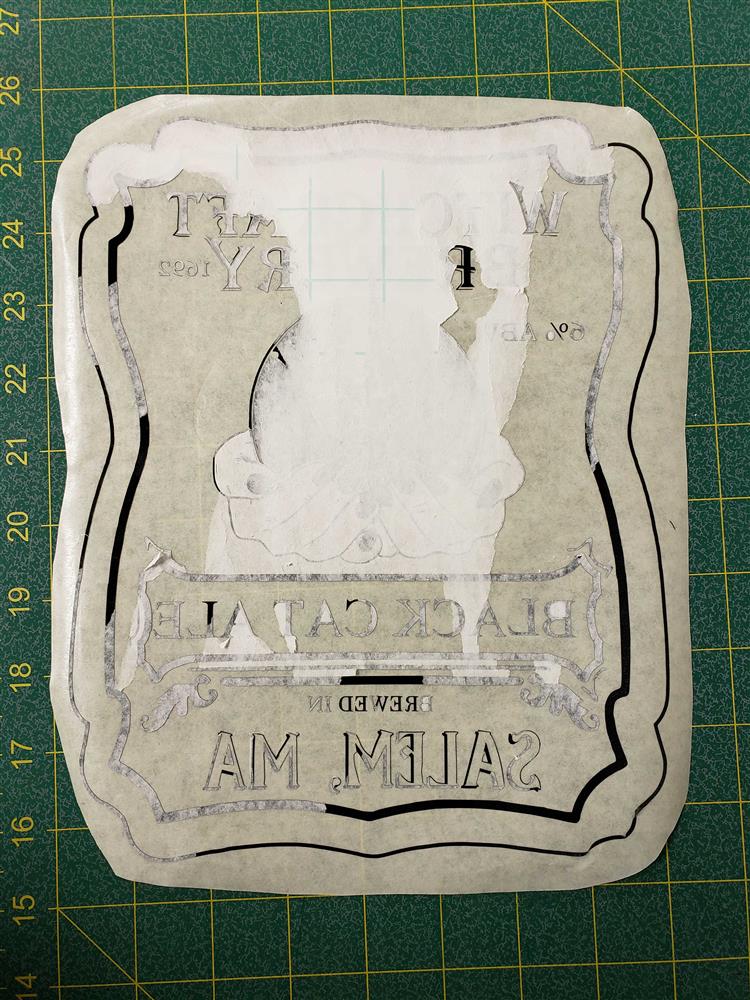
5. Your Vinyl is not Peeling Cleanly From the Paper Backing
Scenario 1: Your decal for a customer will not weed cleanly off the backing paper. When you pick up your design with your transfer tape some of the backing rips off and stays on the back of the vinyl.
Solution: You are cutting too deep. Try lightening up your pressure of your cut. If you cut too deep, the blade cuts a very thin layer of the backing paper along with your vinyl. So, when you go to weed your vinyl, its easier for the paper to rip off with the vinyl than for the vinyl to detach from the backing. Next time adjust your settings so you are not cutting as deep. Always do a test cut to ensure you don’t waste any vinyl.
Still having trouble? If you adjusted your settings but you are still getting some backing coming off with your design, fear not, there is a fix. Once you get your vinyl on your transfer tape, flip it over and weed off the backing paper. Using your weeding tool, grab the thin layer of backing like you are weeding a normal design, and the backing will come right off! It is an easy fix for a few stubborn pieces of backing paper attached to your vinyl.
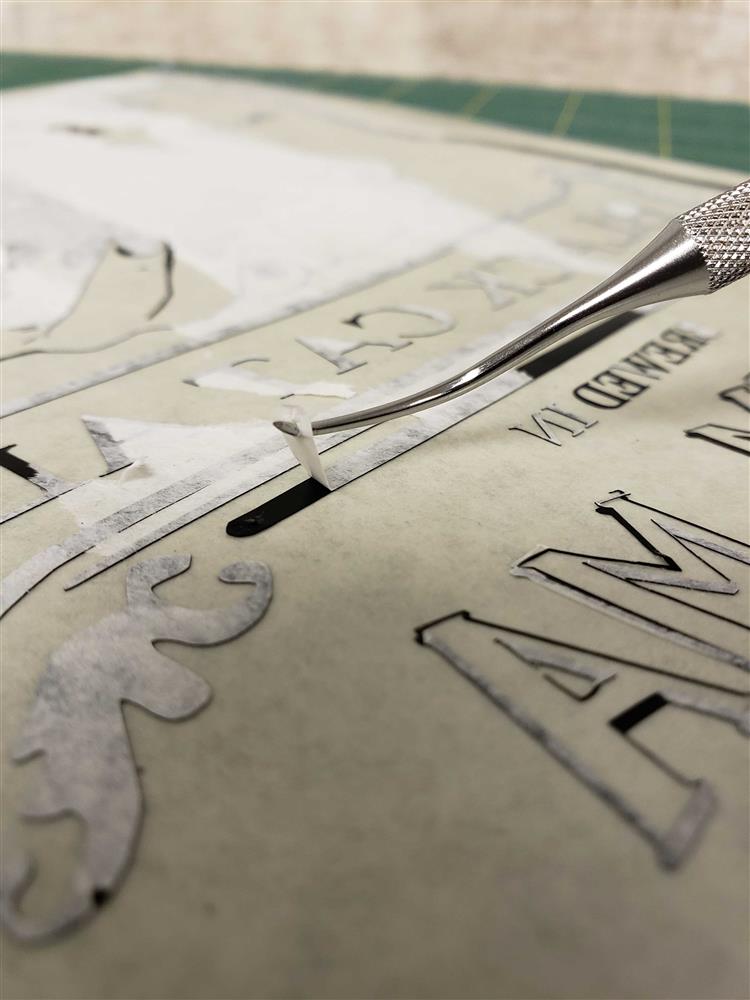
6. Your Vinyl is not Weeding Correctly
Scenario 1: You cut out a very intricate lettering design but when you are weeding it, the letters will not stay on the backing paper and lift when pulling the negative vinyl away.
Solution: Your blade is not sharp enough. Intricate designs are very hard on a dull blade. To get clean cuts for small designs you need a very sharp blade. Keep a special blade set aside or replace your blade if you are noticing your machine is not cutting smoothly or you are getting skips in your cut performance. You can also try slowing down the speed on your cut settings if it’s really detailed.
Still having trouble? Even if your design is cut to perfection, it still may be hard to weed a very intricate design. Try reverse weeding! Instead of weeding your design on the backing paper, weed it after you apply the tape. Once you are done cutting your design, place your transfer tape on top of the un-weeded design first. Pull off the backing paper and weed it on the transfer tape instead. The transfer tape will hold onto your design better than the backing paper making it easier when removing the negative vinyl!
TIP: If you notice your design is cut fine on one side of the sheet of vinyl, but not so nicely on the other side, it might be time to replace the cutting strip on your machine. The cutting strip runs along the bottom of your cutter and is where the blade rests while cutting. Over time, it can become damaged and cause the cuts to become less than desirable.
A Few More Issues You May Run Into...
Scenario: I put my water bottle in the dishwasher and now the vinyl is peeling off.
Solution: If you want to extend the life of your vinyl, we recommend hand washing instead. The high temperatures and abrasive detergents in the dishwasher can be rough on vinyl so it is best to wash it by hand. No adhesive vinyl is dishwasher safe.
Scenario: My vinyl is not staying on my project after following all the prepping instructions.
Solution: Sometimes even after prepping the surface of your project with rubbing alcohol or smoothing a wooden surface, vinyl takes some time to adhere. It takes about 24 hours for the adhesive to fully set onto a surface. It is recommended that you let vinyl sit for at least 24 hours on your finished project before you use or wash it.
Scenario: I have followed the cut settings and it is still not cutting correctly.
Solution: The cut settings are just a rough guideline. If it is not working for you, then try something different. We always recommend making a few test cuts before you cut your final project. Every machine will react just slightly different, so take the cut settings as a quick start guide and adjust them as you see fit. There are other variables that can affect your cut quality too, like blade condition, cutting strip, and even your mat.
Scenario: Your cute monogram on your cup only stayed for a few days and now it is peeling off.
Solution: Make sure you are using the correct vinyl. You will want to use permanent vinyl, like our Siser® EasyPSV™ permanent, this has a strong adhesive for a strong and durable hold. If you use a removable vinyl, like our Siser® EasyPSV™ removable, this will not last as long because the adhesive is not meant for items for everyday use, such as mugs or tumblers.
TIP: You also want to make sure to choose your font wisely. Thin script fonts with very fine lines tend to peel much easier than a thicker block font on cups.
Are you still having problems with your adhesive vinyl? Give us a call at 905-789-5770 or email us here and we’ll be happy to help you figure out what is going on!