After you have been working with vinyl for a while you start to forget how crafting used to be. A whole project generally took several days to be completed; gluing, cutting, painting, taping, not to mention the mess you had during this process. Once I completed this project, I had a whole new appreciation for vinyl!
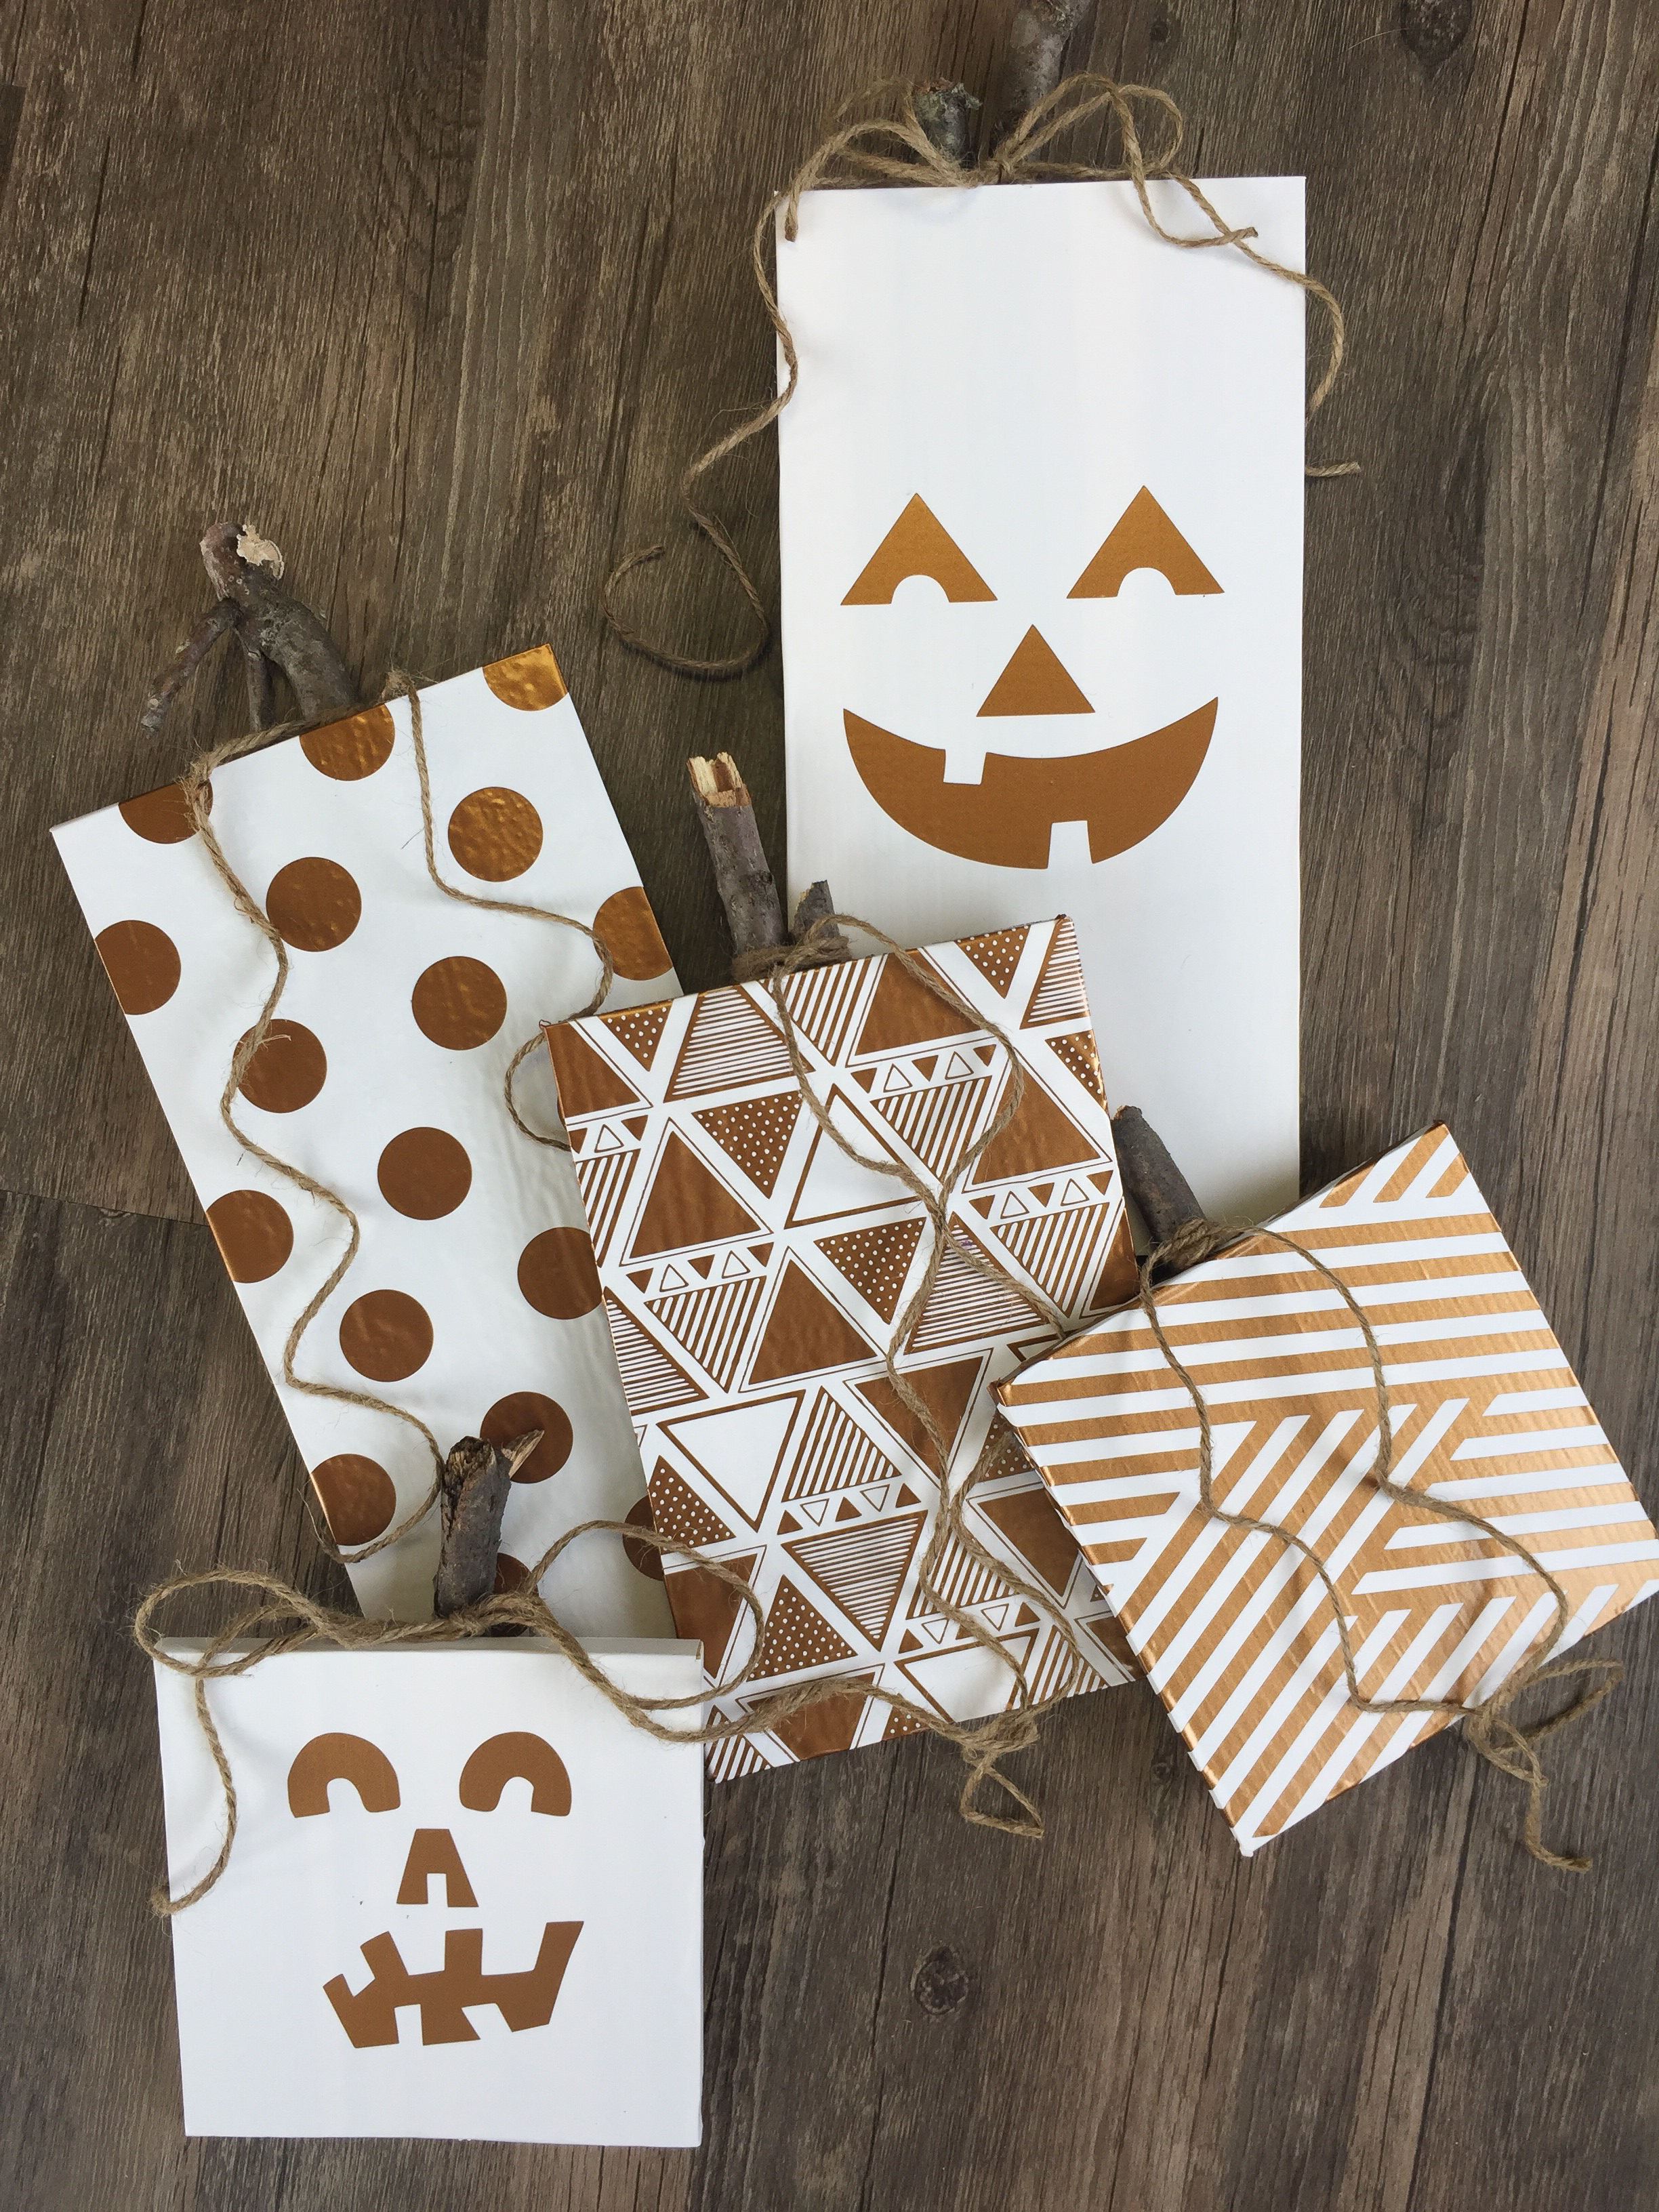
I wanted to create an adorable set of fall pumpkins using adhesive vinyl instead of messing with paint. I only needed a few supplies, a few of which you may already have at home.
What you need:
- Wood planks (I purchased mine on Amazon)
- OraCal 631 Removable Adhesive Vinyl - White
- Oracal 651 Permanent Adhesive Vinyl - Metallic Copper
- Sticks
- Twine
- Silhouette Cameo 3
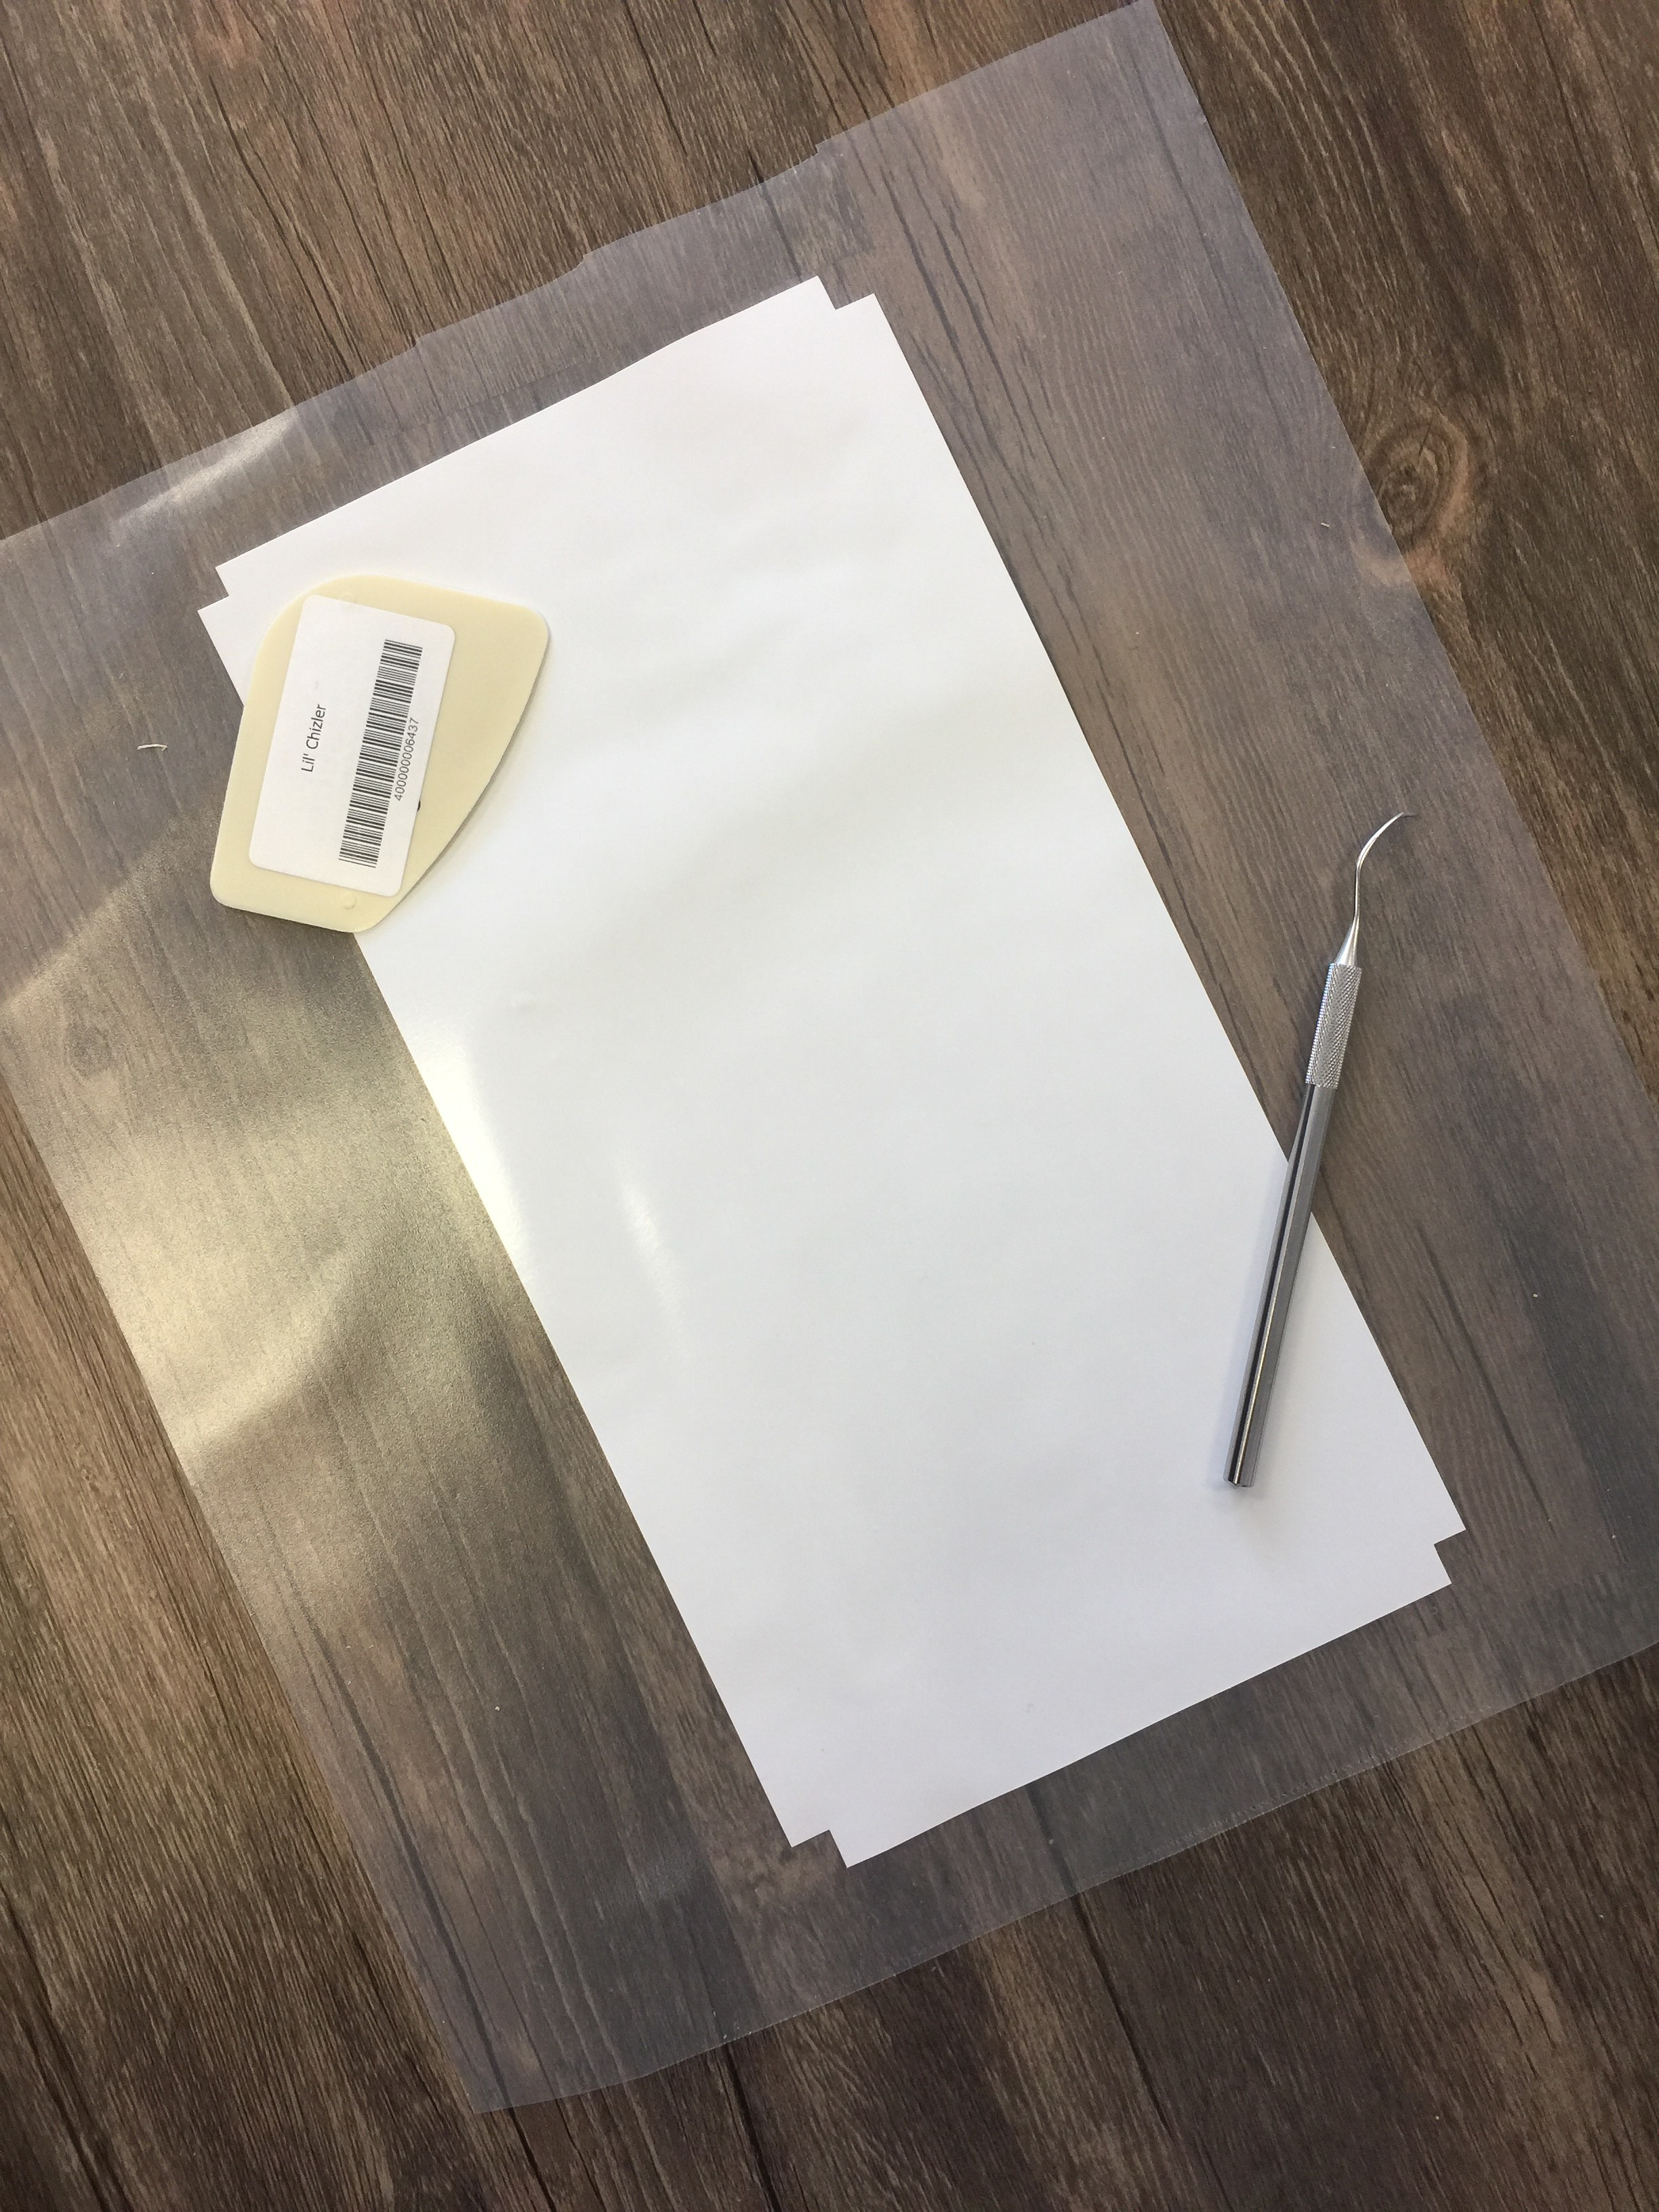
- Weeder
- Lil Chizler
First, I had to cut the planks in 3 different sizes so that visually it would have a tiered effect. Once cut I needed to cover the planks in vinyl so that they all had the same background. Since my planks were all rectangles I used the rectangle tool in Silhouette studio for my cut lines. I made sure to increase the size a half inch on every side to make sure that it would cover the sides of my 3-dimensional wooden plank.
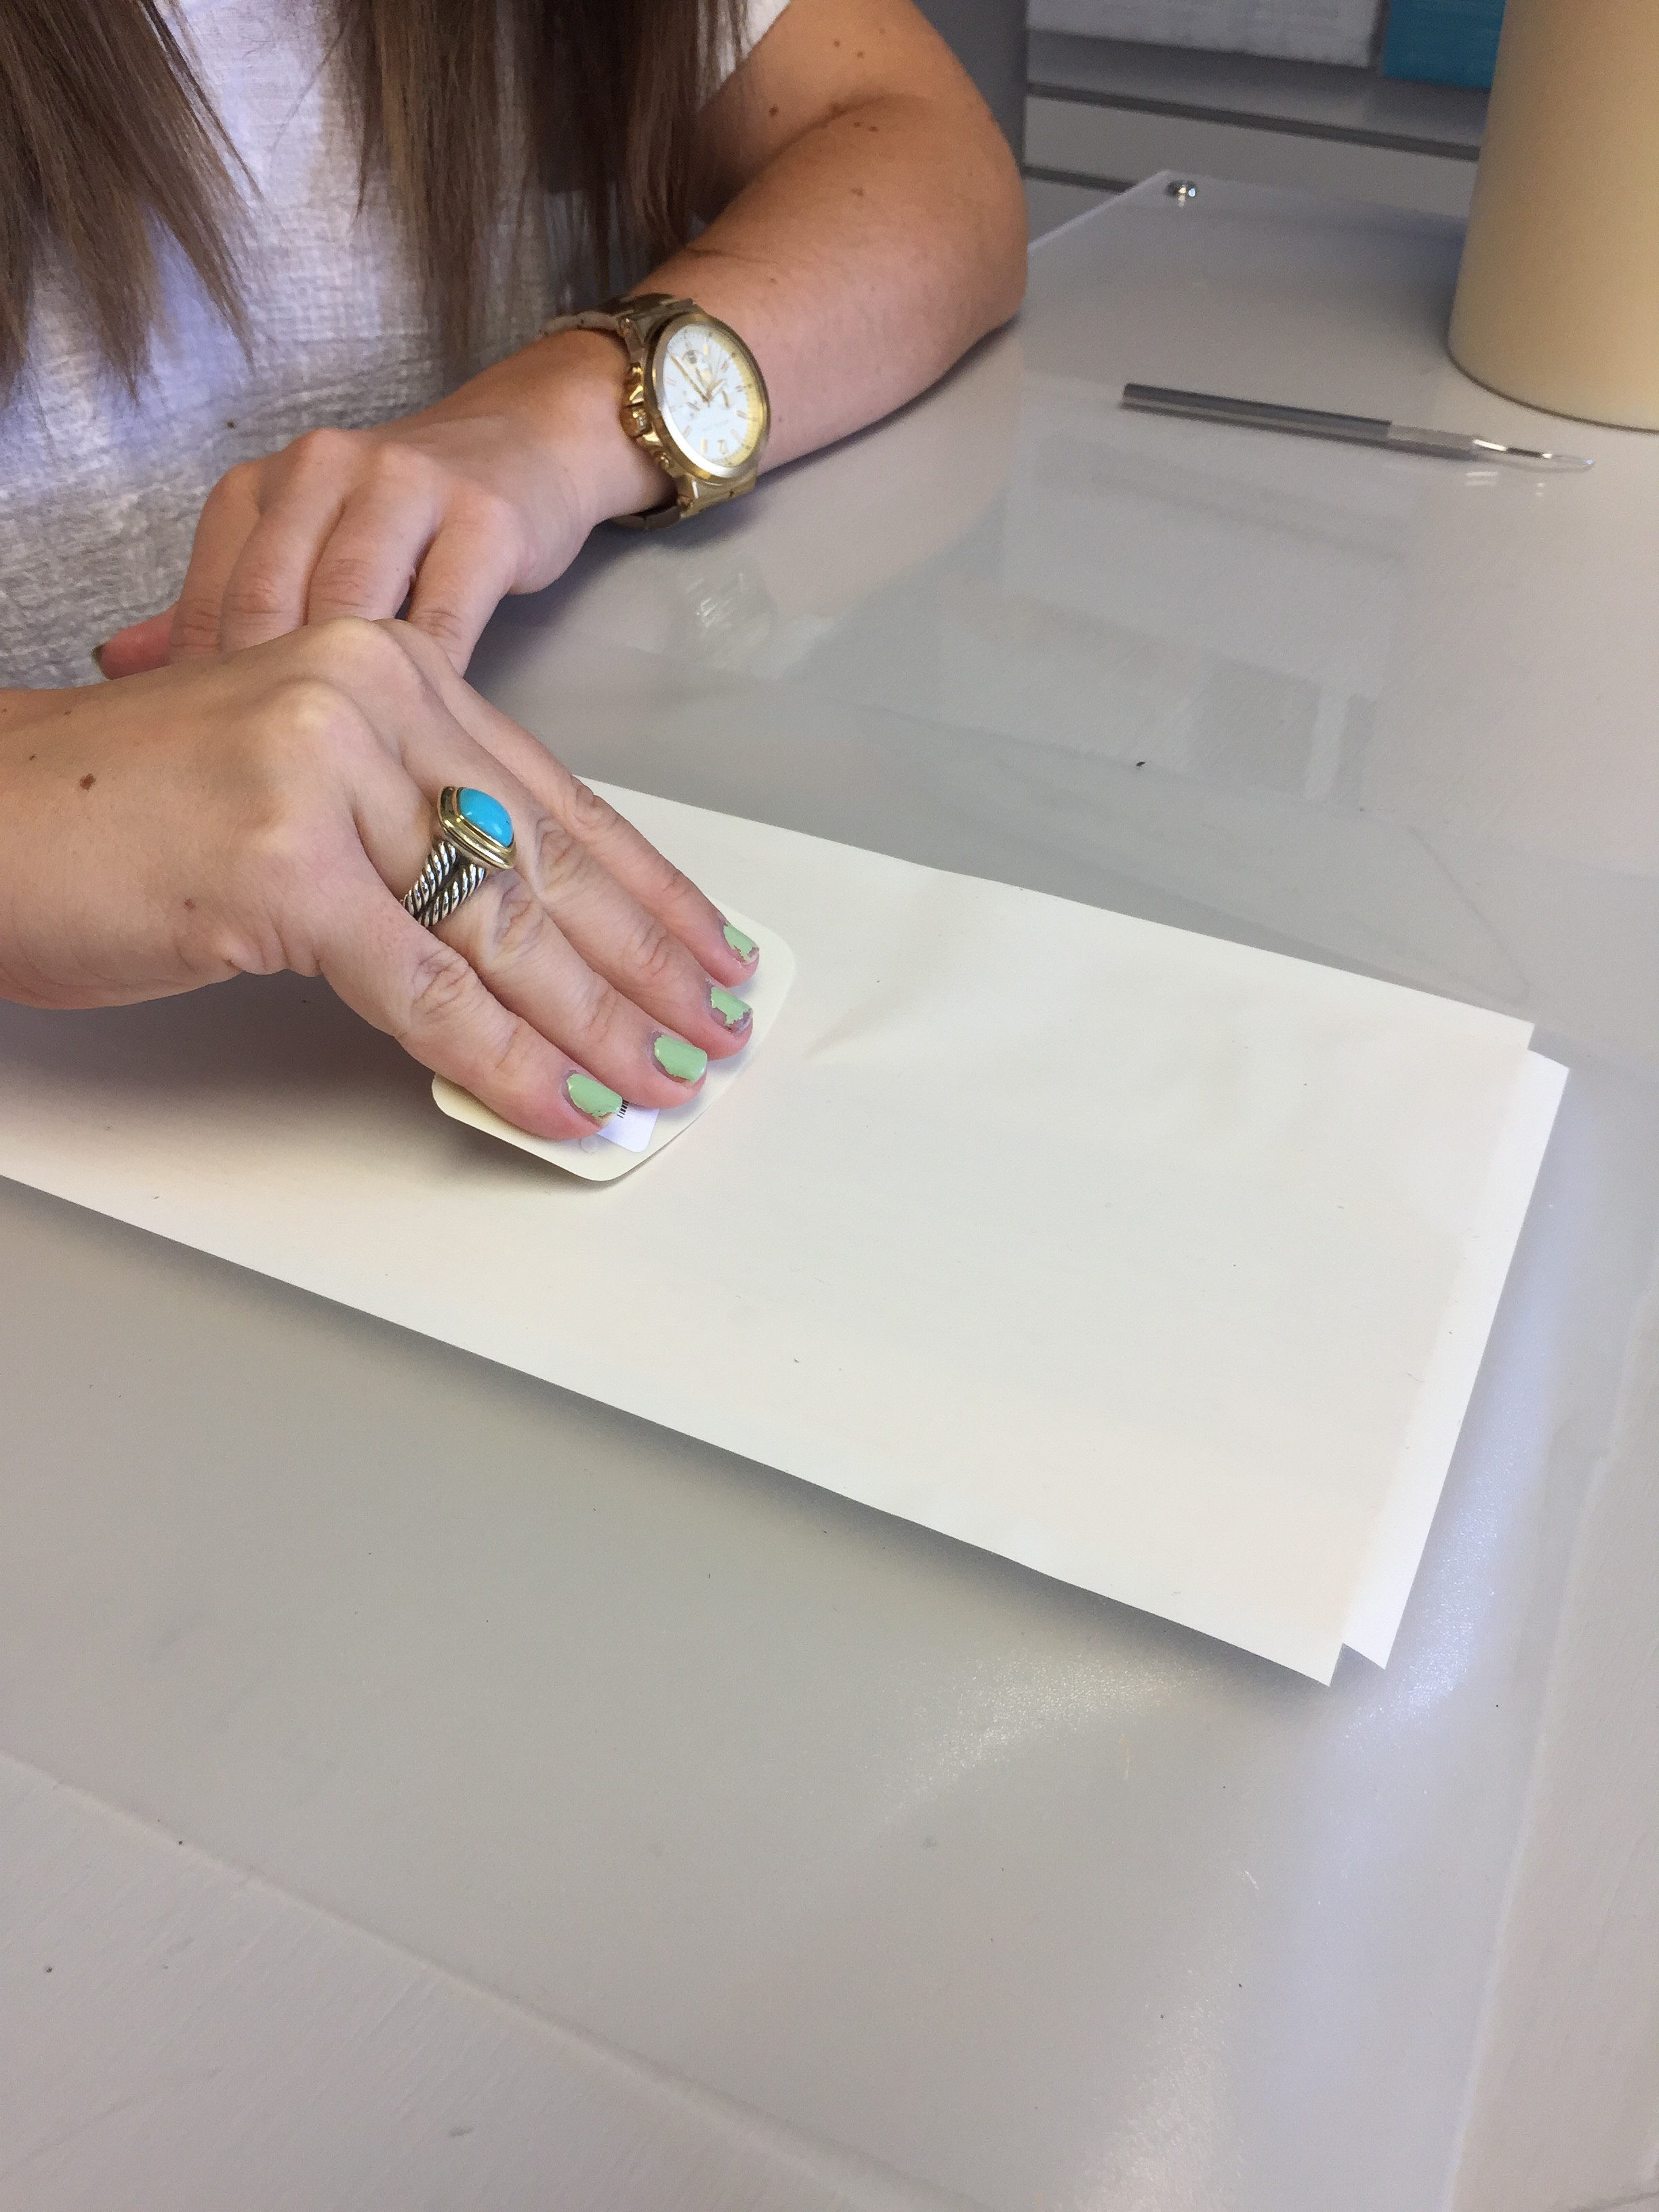
Cutting this on my cameo took no time at all with this basic shape. I chose to use OraCal 631 Removable Adhesive Vinyl in white as my background because I wanted that matte finish, this way my second layer would really stand out! After I weeded the rectangles out I placed them on a flat surface laying the transfer tape on top. I grabbed my “Lil Chizler” tool and began pressing, starting from the center to the outside making sure there were no air bubbles.
To ensure that the vinyl laid flat on the sides of the wood planks I needed to cut a square out of each corner of the rectangles so that it would fold over. Using the applied transfer tape I folded over the sides one by one and pressed until the vinyl was applied on the front and all four sides.
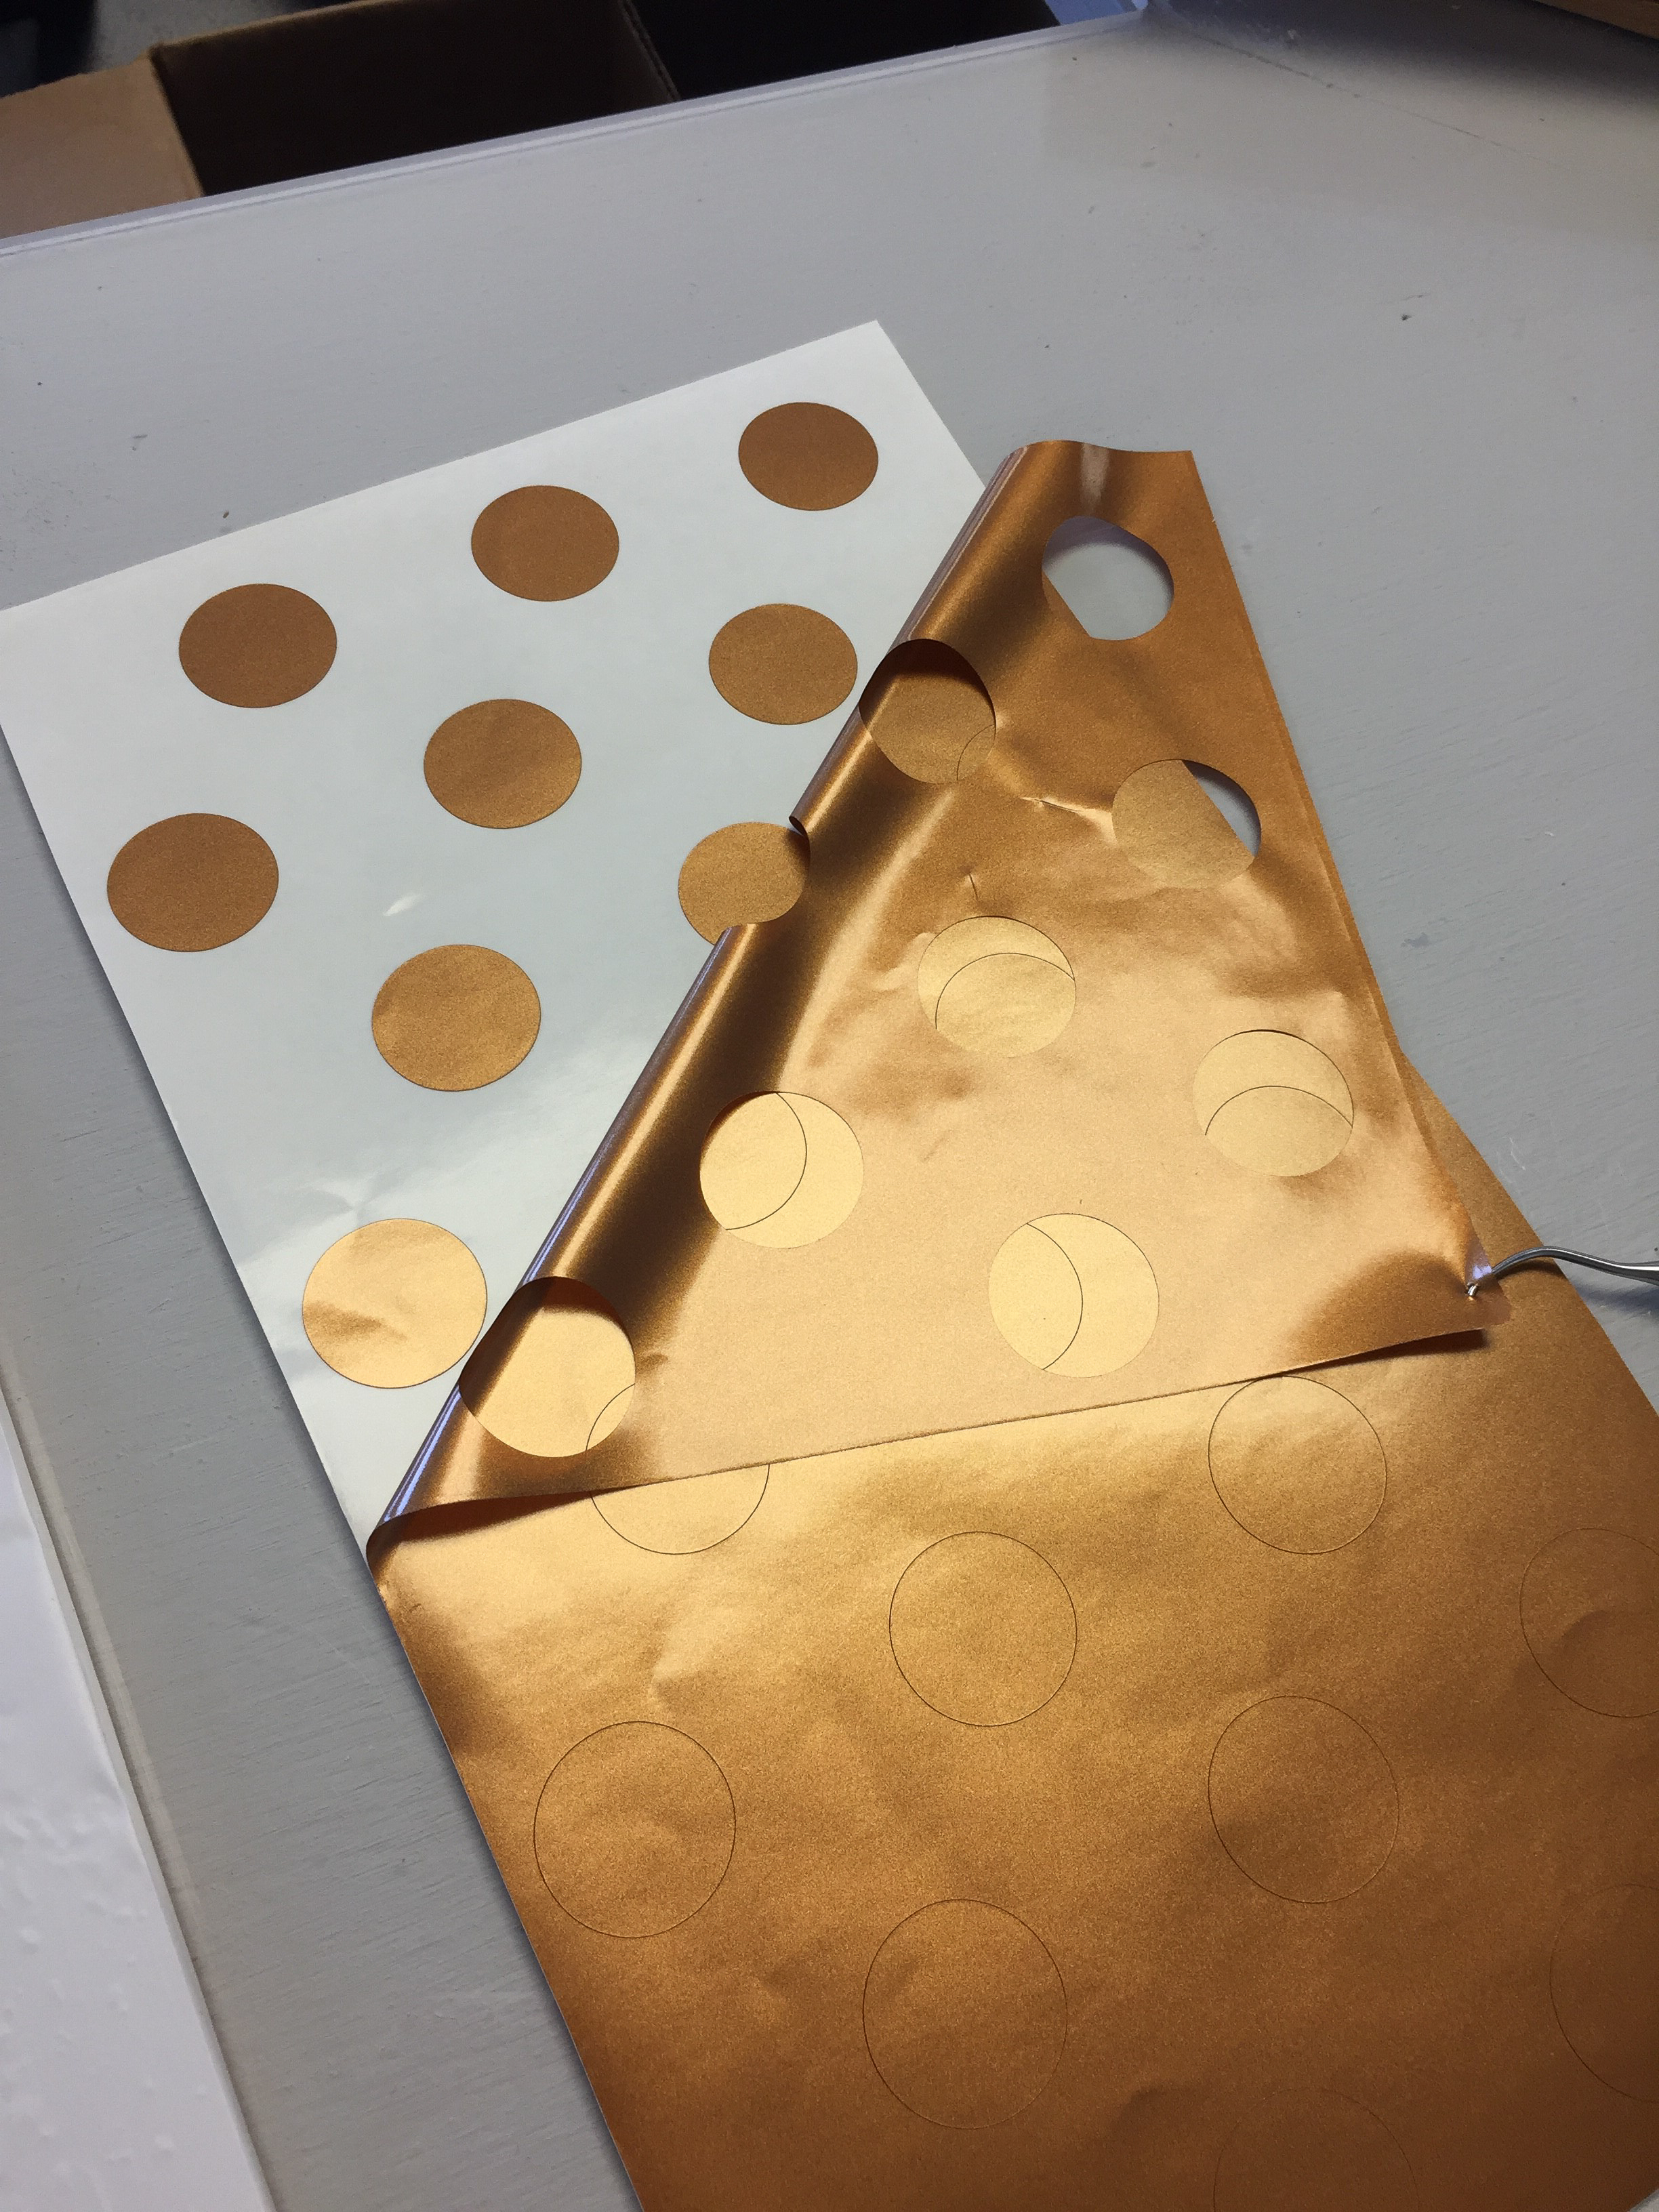
Next step was the fun part! I found a mixture of patterns and pumpkin faces that I wanted as my second layer. Once I brought them into silhouette studio as jpeg files, I traced over each design individually making sure that the red cut lines were visible. From there I cut OraCal 651 permanent adhesive vinyl in metallic copper with my Silhouette Cameo. Some of the designs were pretty detailed, but with the recommended settings I had a clean, crisp cut.
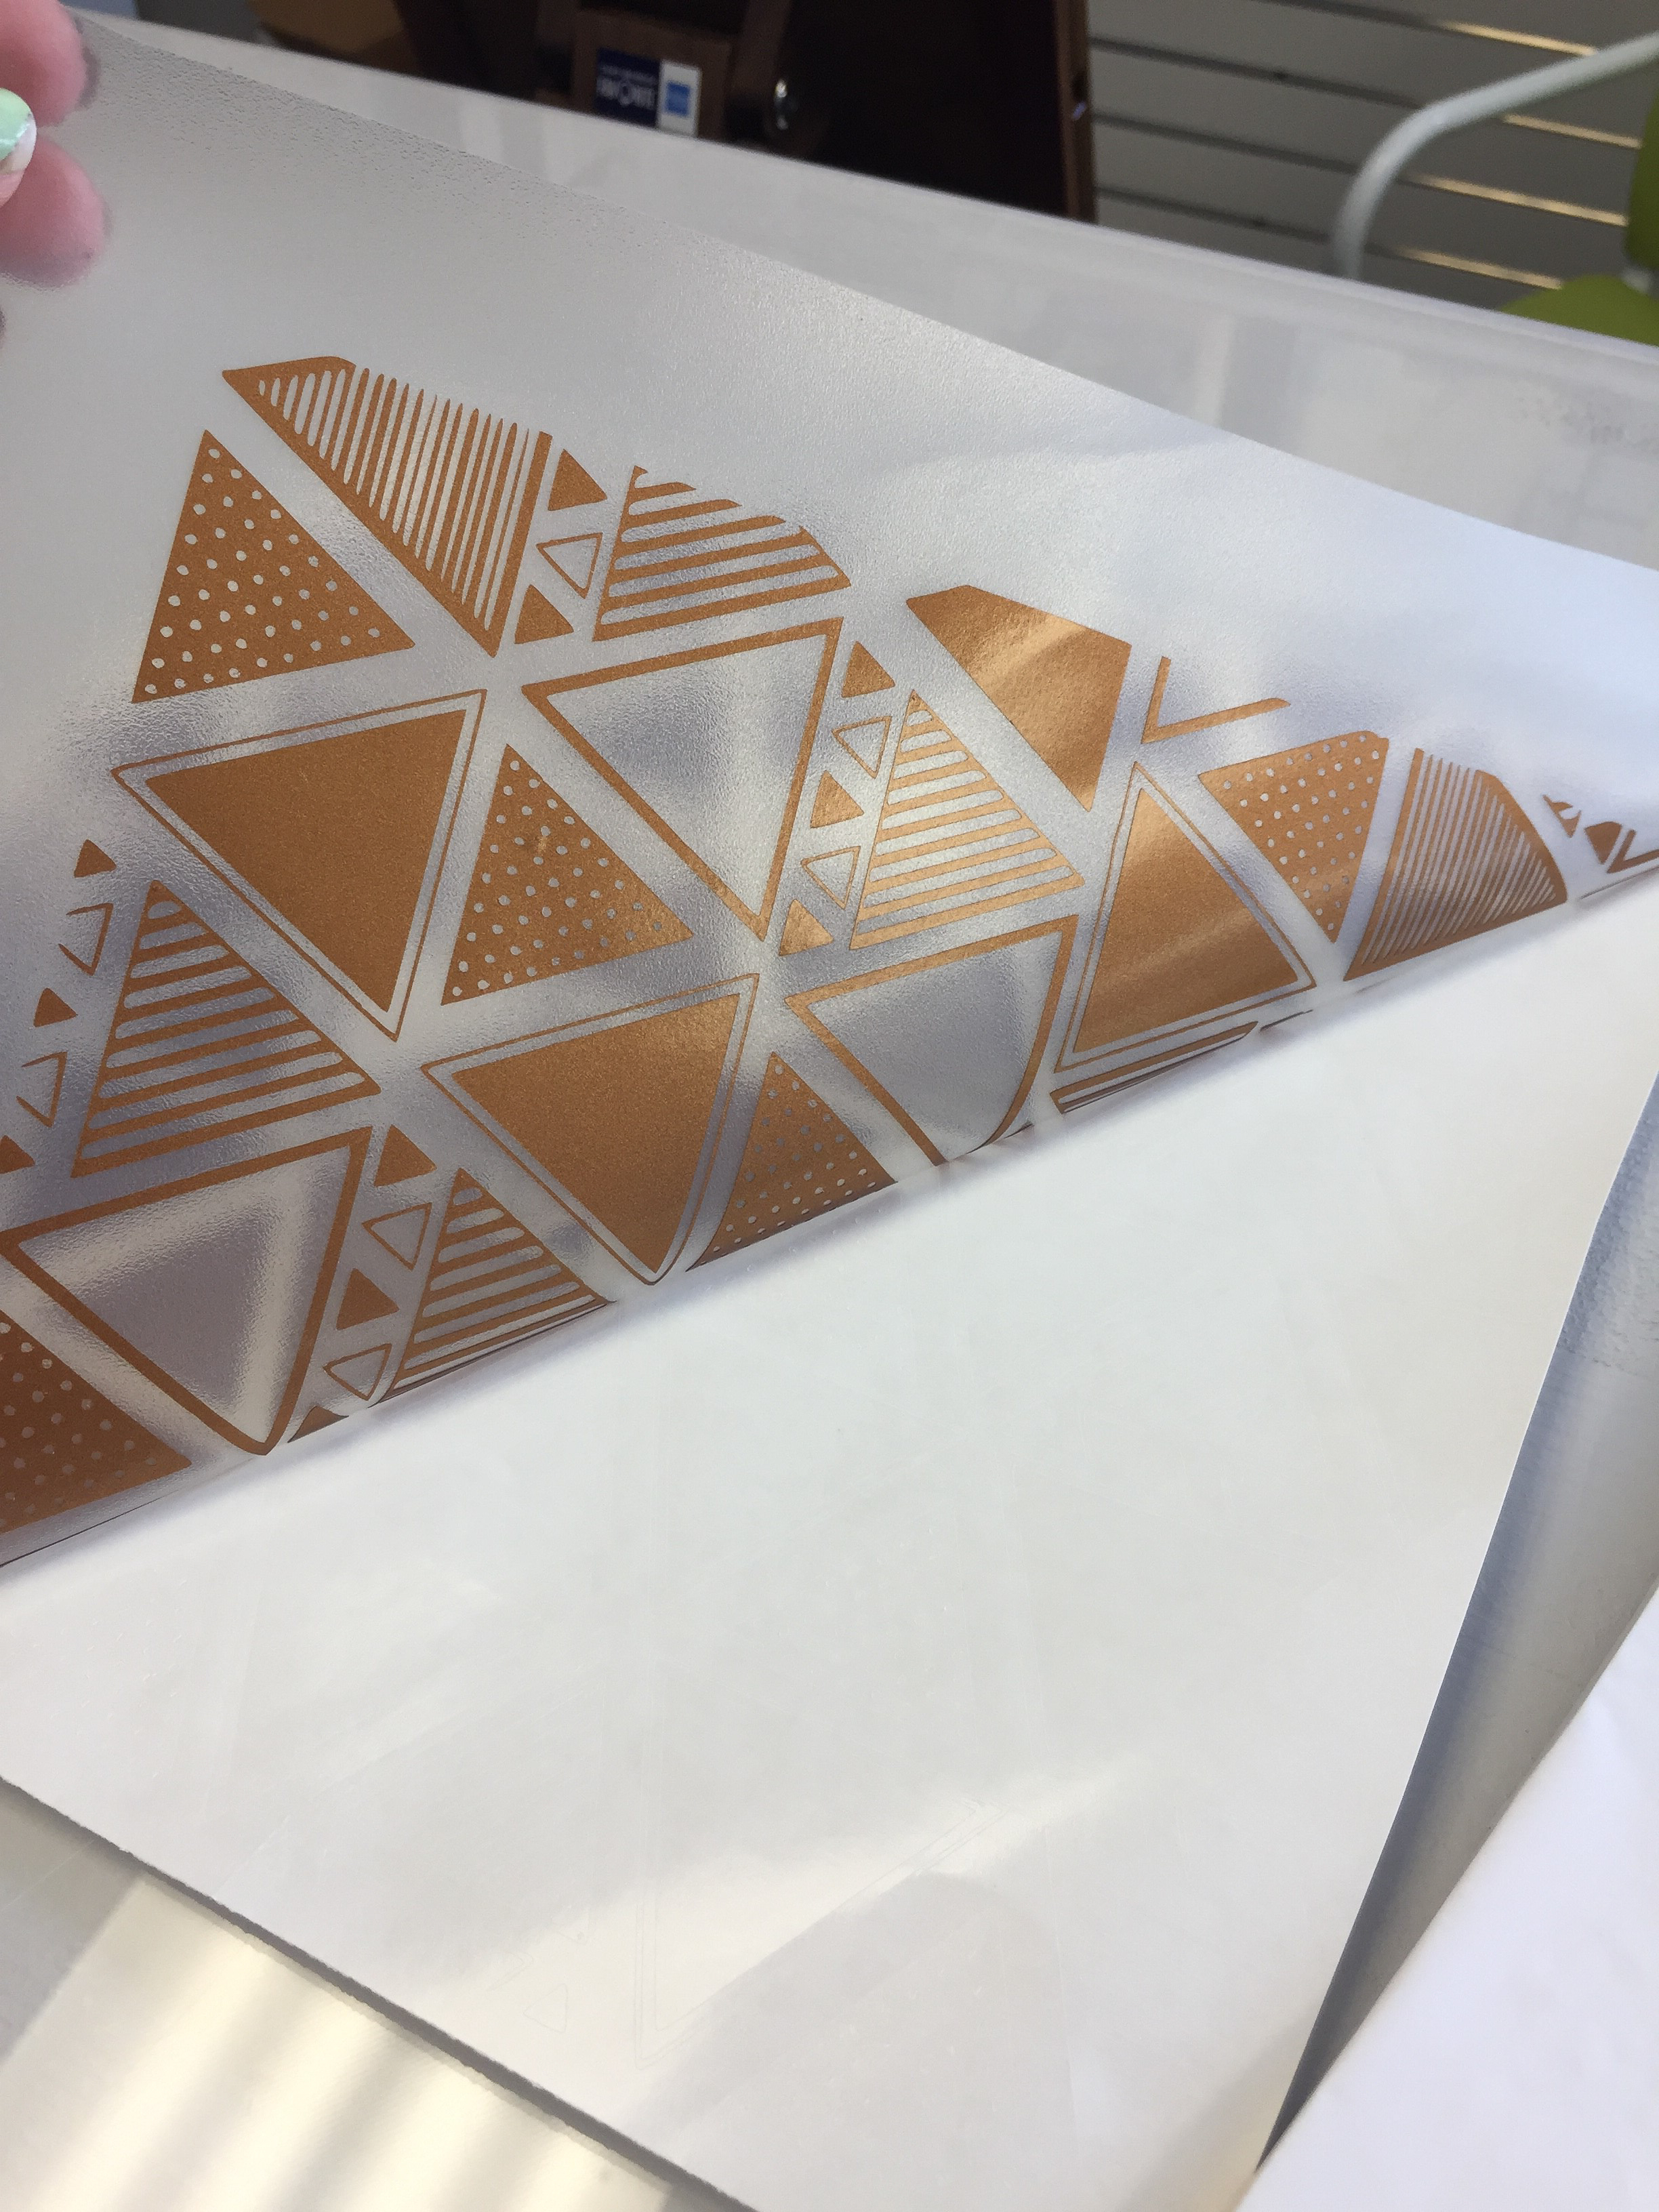
Weeding these designs did take some time but definitely added detail, plus I kind of enjoy this step. I again used my transfer tape to grab the design from the carrier sheet and adhere to the white background on the wood.
To add the final touches, I found some sticks outside and glued them to each pumpkin, adding twine around the bottom for even more layer.
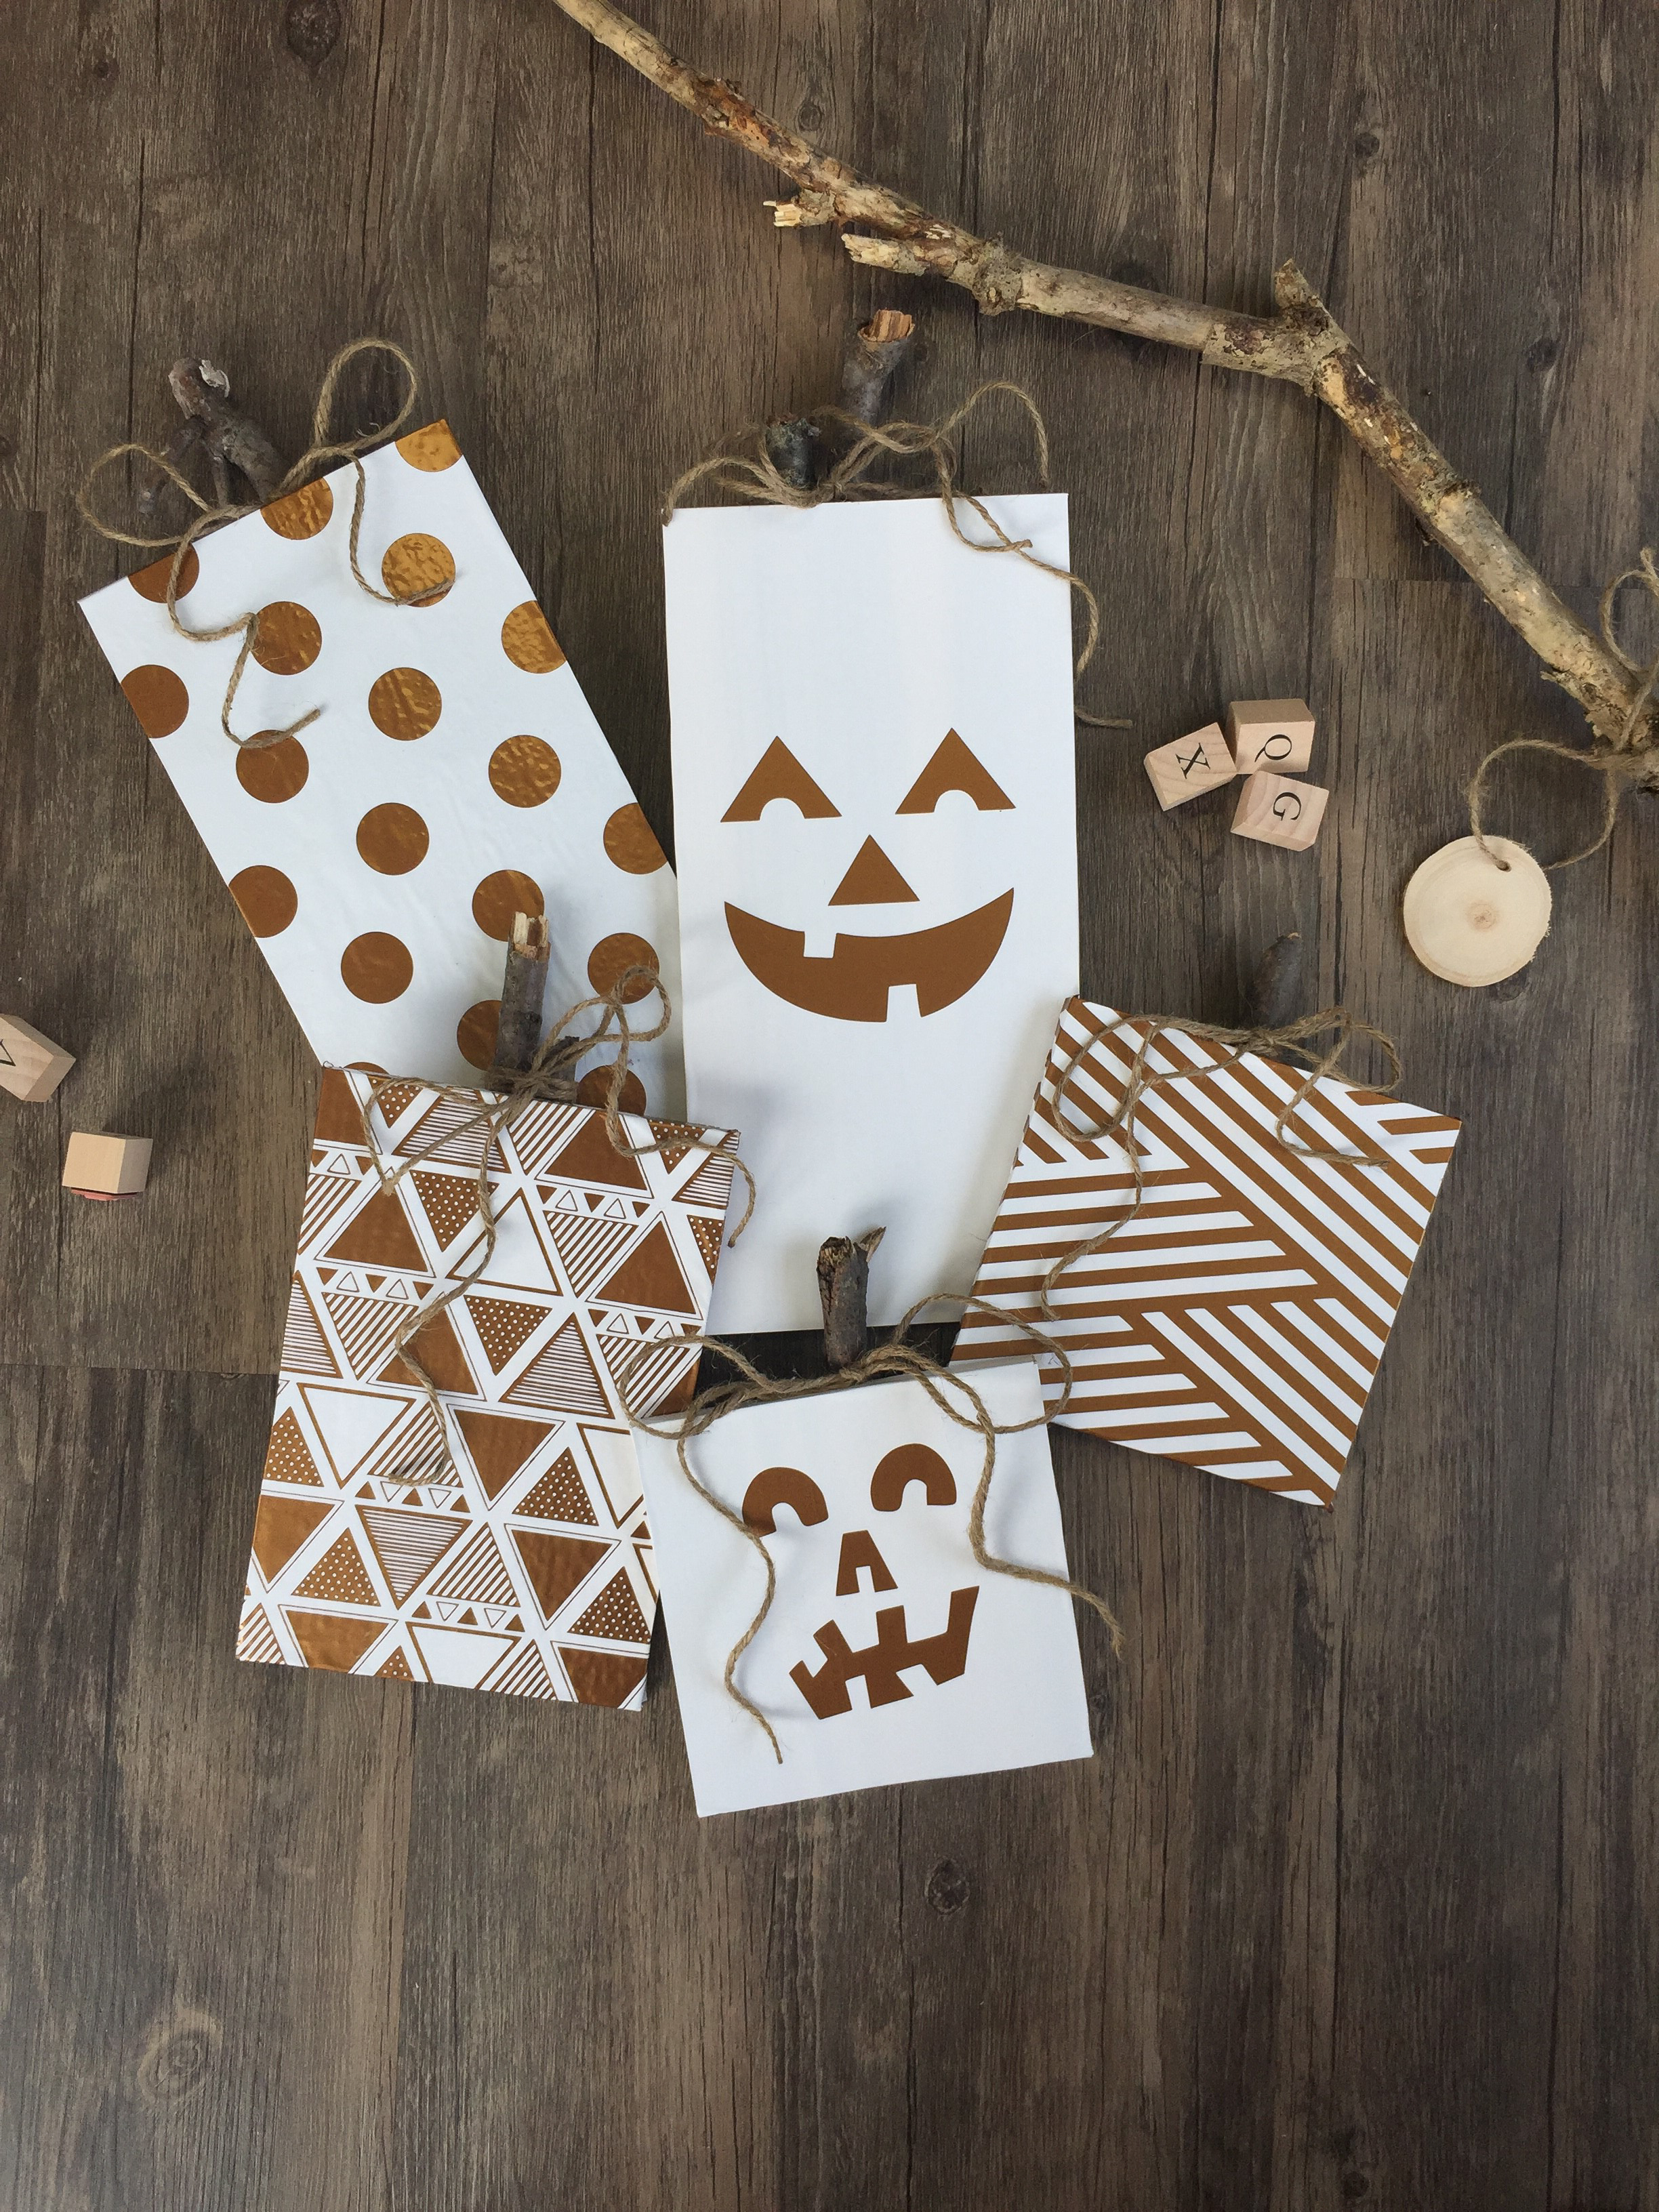
This is one of those projects that can have so many different themes! I chose to use just 2 colors and a blend of both patterns and faces, but for the future, I may try something a little different. These pumpkins can be a great way to add décor to any dining room for the holiday season. This would be a great project to sell at your next fall craft show! The best part is that we have an entire e-book dedicated to selling at fall crafts. You can download your copy by entering your email address below.